Thursday, October 10, 2019

Not a Card I Wanted to make This Week


This is so not the kind of card I wanted to make this week.

Unfortunately, we had an unexpected death in our family earlier this week. And, of course, I didn’t have an appropriate sympathy card in my stash ready to go. Pinterest to the rescue for inspiration!

Here is the card that I made:


I inked one side of a Spellbinders double-sided embossing folder before laying down the designer paper & running it through my embossing machine to create the background texture.  The designer paper is retired and is from Stampin Up.  The sentiment was stamped with Stampin’ Up’s Basic Gray ink on a scrap of white cardstock, then run through my die cutter to cut out the shape.  

I laid a piece of lace across the front, then glued the sentiment on top. I layered the card front onto a slightly larger piece of designer paper  (the flip side of the green), then glued that onto my white 5”x 7” card base.

IMPORTANT - please read!
If you are struggling with thoughts of suicide, PLEASE!!!  Get help or reach out to someone, anyone! If you have no one to whom you can talk or confide in, please call the Suicide Prevention Line at 1-800-273-8255!  Suicide is never the answer. 

Friday, October 4, 2019

MMTPT584


It has been a while since I’ve participated in a Teapot Tuesday Challenge over at Splitcoaststampers.com, so I figured it was time to jump back in!  This week’s  challenge  is to make a masculine card for a gentleman in Lakeville MA.  He likes fishing, and antique cars & trucks.

Here is my card:


I used an Impression Obsession stamp that is, in my opinion, an artistic rendering of a grill from an antique roadster with just a hint of Steampunk. I have fallen in love with Stampin Up’s color, Blueberry Bushel, so I used that color ink and cardstock to make a monochromatic card.  I used Stampin Up’s Pinewood Planks 3D embossing folder for the background texture. I die cut the sentiment three times & stacked them together to add more dimension. I’m not sure if you can see it, but I used Glossy Accents on the headlight and grill emblems.  

Wednesday, August 14, 2019

Blast From the Past – Pocket Cards!


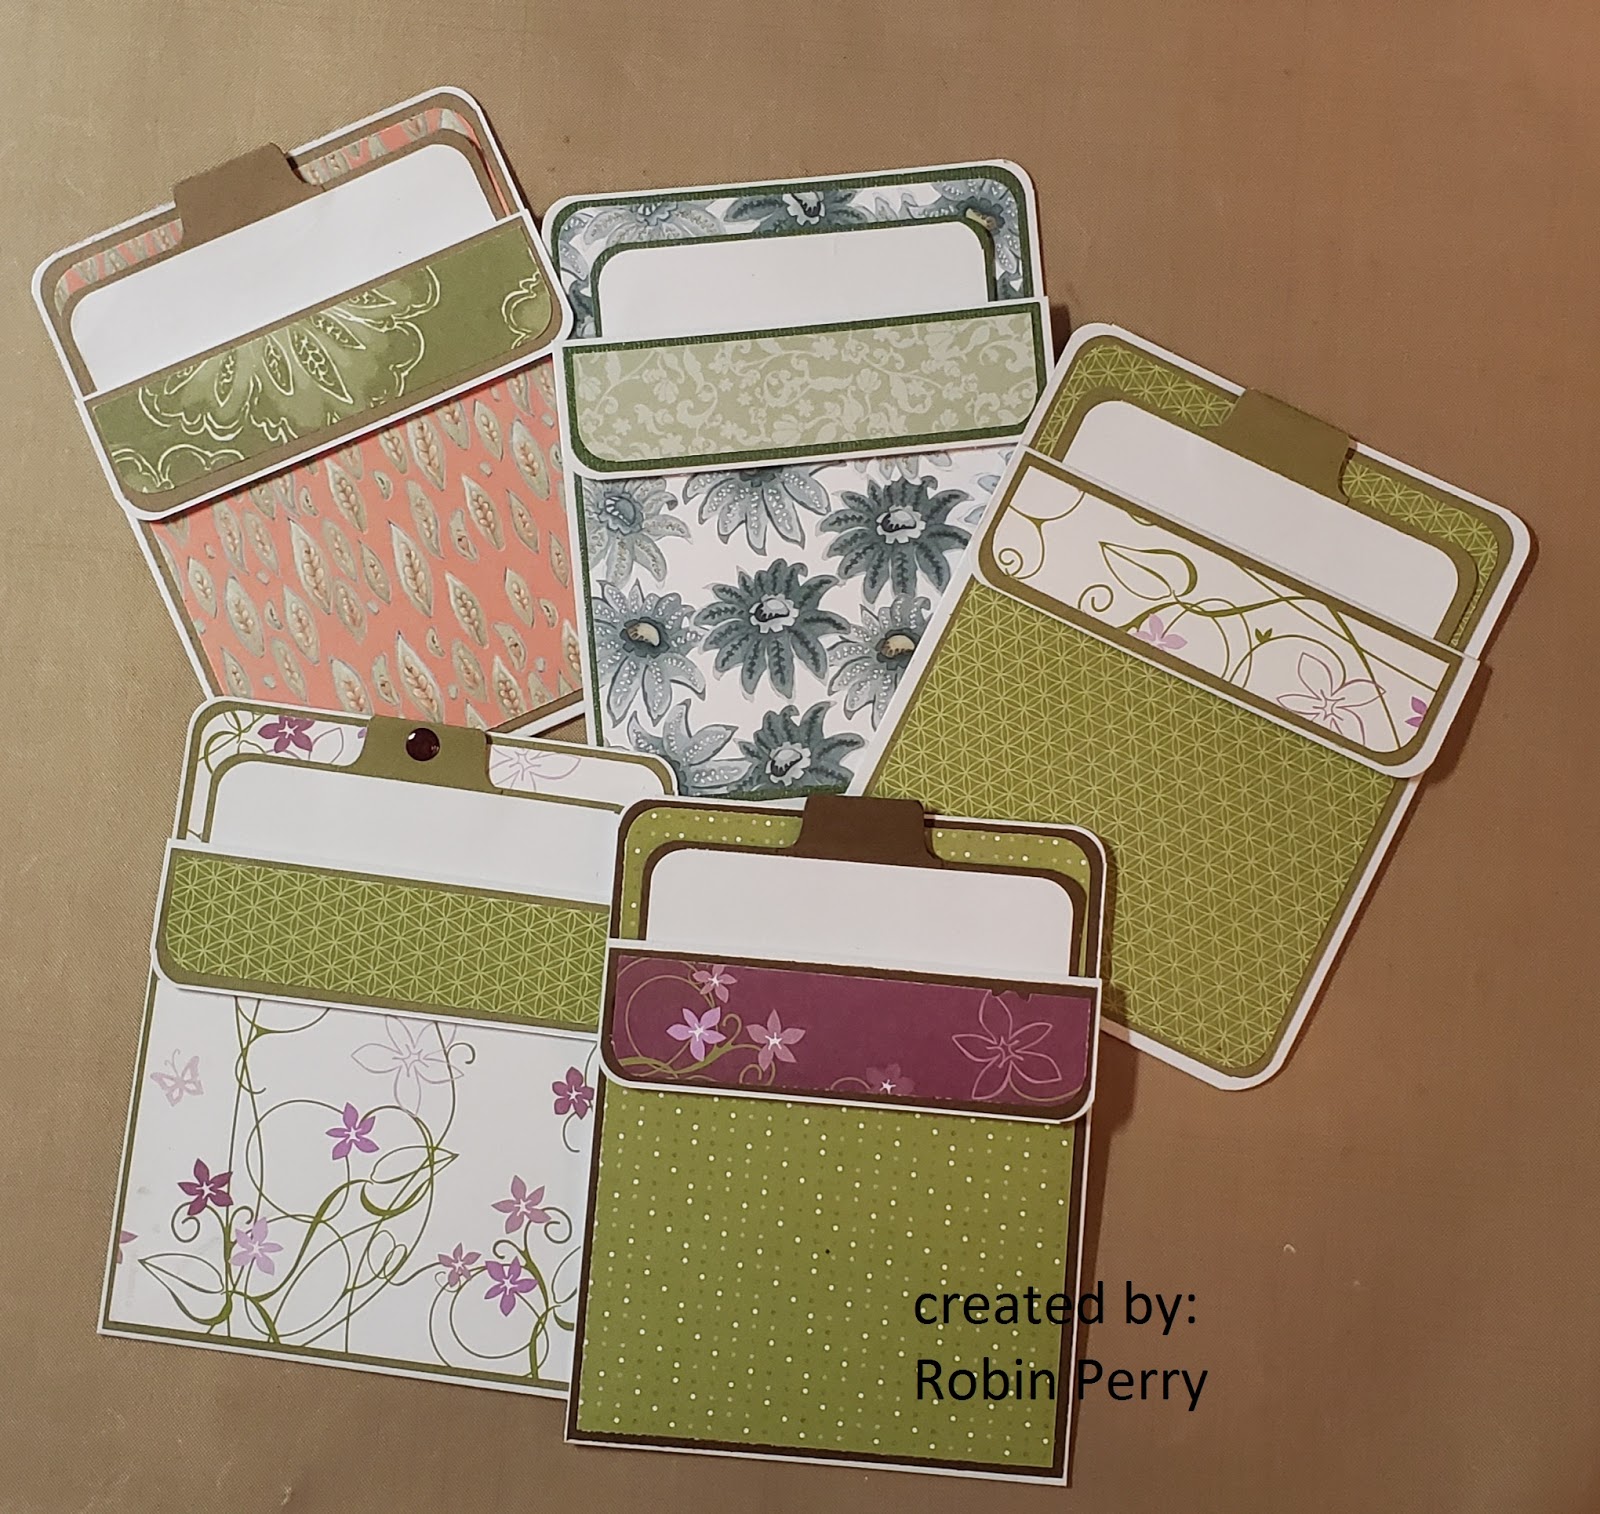
I was cleaning my studio and came across a note with rough information on creating a pocket card. Apparently this note was from 2008 because the first line on the paper was 2008 In Colors!  Well, as I was reading my note, I couldn’t visualize the end result, so I decided to try making one. 

Once I cut the paper to 4-1/2 x 11 and scored it at 1-1/4 & 
5-1/2, the light bulb over my head turned on!  It is a mountain fold at the 1-1/4 score line and a valley fold at the 5-1/2 score line & glued together along the sides.  That creates the pocket, which can then be decorated and stamped.  I made several and used up some scraps of old Stampin Up designer papers.  The size of the base layer of the insert is 3-3/4 x 5.

Here is a pic of most of the cards that I made. These cards are going into my stash – I’ll stamp an appropriate sentiment and decorate them more when I know who each card will be going to.


Then, I got to thinking about how to make a 5 x 7 pocket card.  I tried cutting a piece of cardstock to 7 x 10, but then realized that it could not be scored and folded to create the pocket.  So, I cut the cardstock  along the long side at 5 inches, & scored one of the pieces along the short side at 2 inches. I folded down the flap (mountain fold) and used 1/8” score tape (along the sides and bottom) to adhere it to the back panel.  

Here is a picture of the card that I will most likely be sending to my granddaughter later this year.  She is not a girly-girl, so no flowers!  I may add a bit of glitter to the balloons, though, because the card is just too plain for me!


This is the inside pocket. The sentiment is a wood mounted stamp that I have had for years & I have no idea what brand it is.  I used a Spellbinders gift tag die set to create the pocket on the left side; I'll slip in some money and a gift card for her.


Wednesday, June 19, 2019

Teapot Tuesday Challenge (MMTPT569) at Splitcoaststampers.com


I made this card last night for the Teapot Tuesday challenge at Splitcoaststampers.com.


Our cards for this week’s challenge are going to Jonesboro, AR to the grandparents of a 12 year old young man who recently lost his battle with cancer.

This is a standard A2 card. I used a scrap of designer paper for the two rectangles and layered them onto olive green cardstock.  The center panel was dry embossed with an embossing folder then layered onto the same olive green cardstock.  The sentiment was stamped with Hero Arts black ink; I then went over “Sympathy” with a gold glitter pen.

Tuesday, June 18, 2019

Father's Day Card

My nephew received this card for Father's Day.


I embossed a piece of black cardstock using a
Tim Holtz 3D folder and metallic paste to add 
dimension and shine. The sentiment was stamped
on silver mirror cardstock with Stazon ink. Then layered on top of black cardstock. Once the front was finished, it was layered onto a black A2 card.

Wednesday, June 12, 2019

One More Recessed Panel Card!


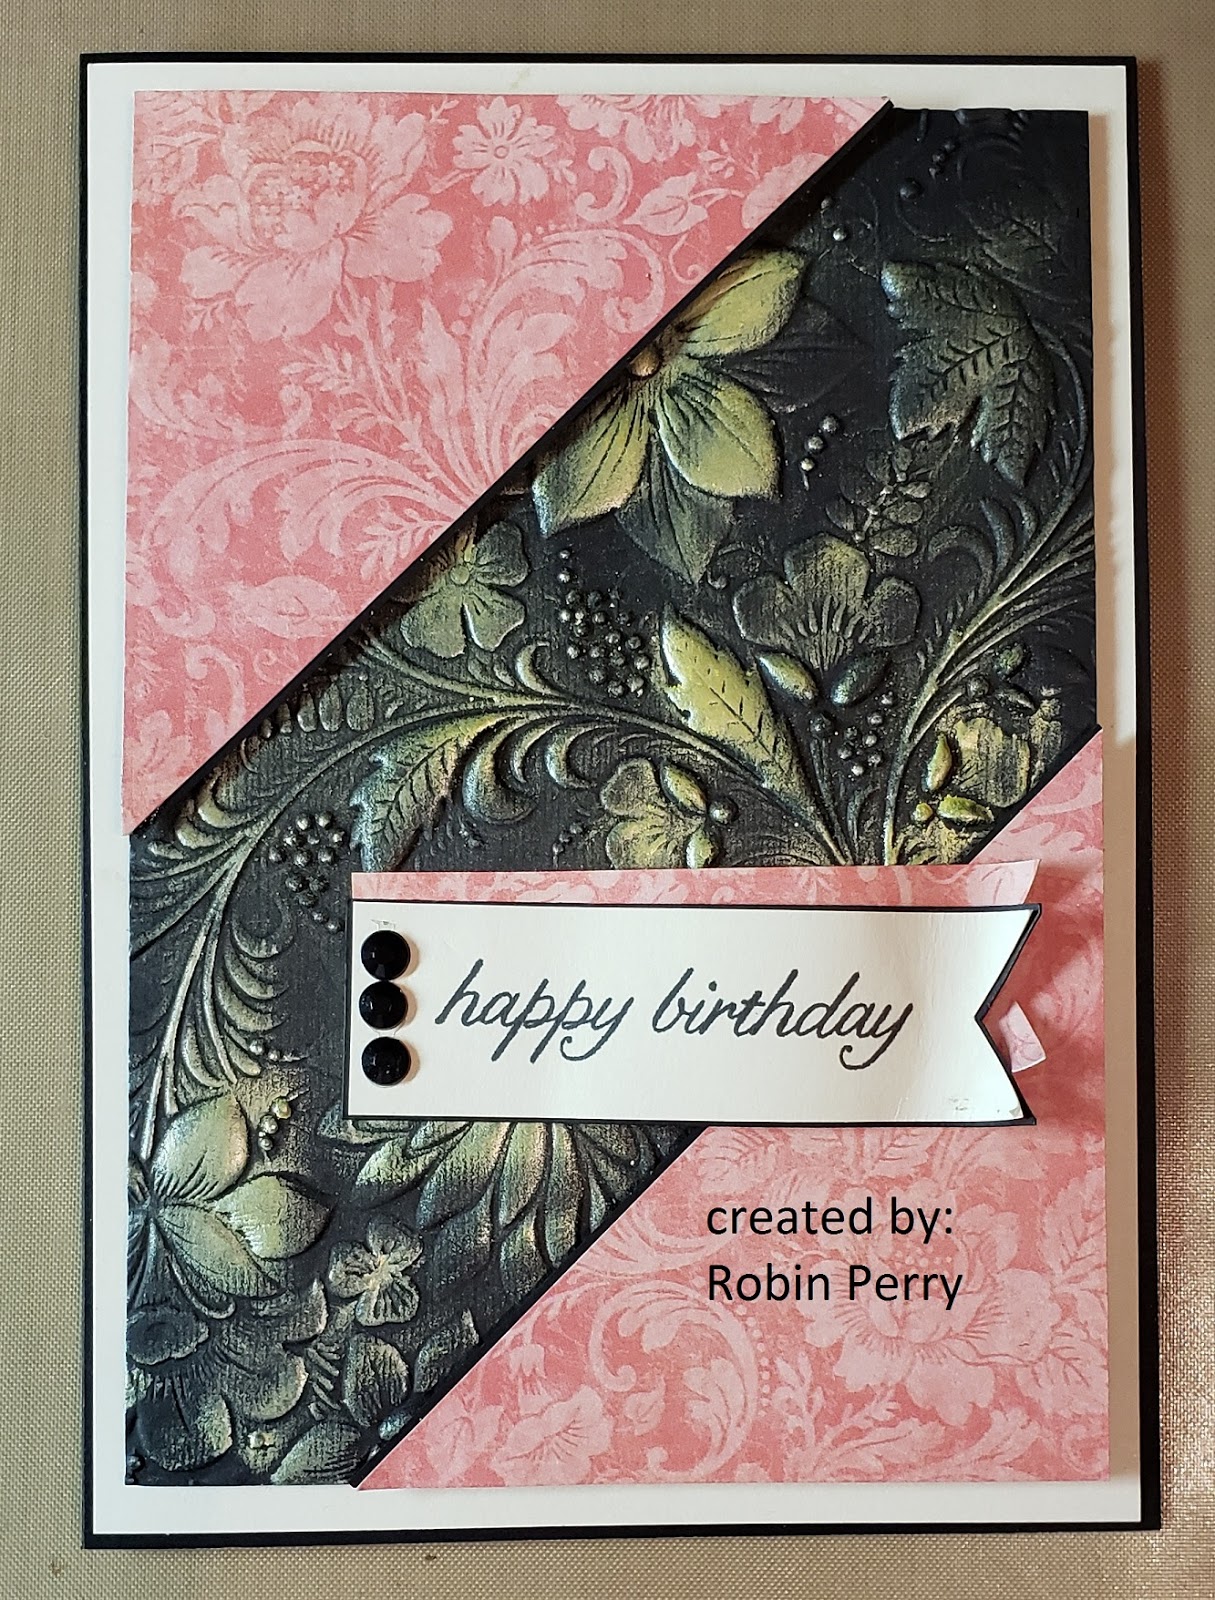
This will probably be the last Recessed Panel card that I post for awhile. Unless, of course, I happen to create one that is Super Duper Awesome. (wink)


This particular card also uses a dry embossing technique. After embossing the black cardstock using a 3D embossing folder, I rubbed some gold mousse on the raised parts to add color and give a shine to the paper.  The finished size of this card is 5x7.

I’ve been organizing my art studio and paring down stuff in order to consolidate and save space. Part of the organization and consolidation effort is taking things out of their packaging and storing like items together in the same manner.  That is the reason why I have not been able to supply the brand of dies, folders, papers, etc. or the product names.  I also try to use paper from my scrap bin first before cutting into a new sheet of cardstock or designer paper.

Monday, June 10, 2019

Recessed Panel Card - Take Two!


I think I’m obsessed with these Recessed Panel cards!  They are so much fun to make … and relatively easy, too!  I like “easy,” don’t you?


The center blue and cream panel was made using the cut out pieces from the card I posted on June 6th. I laid it across the designer paper panel and fiddled with it until I found the placement that I liked. After gluing it down, I trimmed the edges so that they were flush with the designer paper.  In retrospect, I should have waited to trim the edges until the designer paper was attached to the mat. I think the card would be more visually appealing. But! It is what it is, and I’m fine with that!

The flower trio is a Deep Red stamp and the leaves are from a die set, as is the center tag. The sentiment is from Just Rite stamps.  This card is a standard A2, so it measures 4-1/4” x 5-1/2”.

Thursday, June 6, 2019

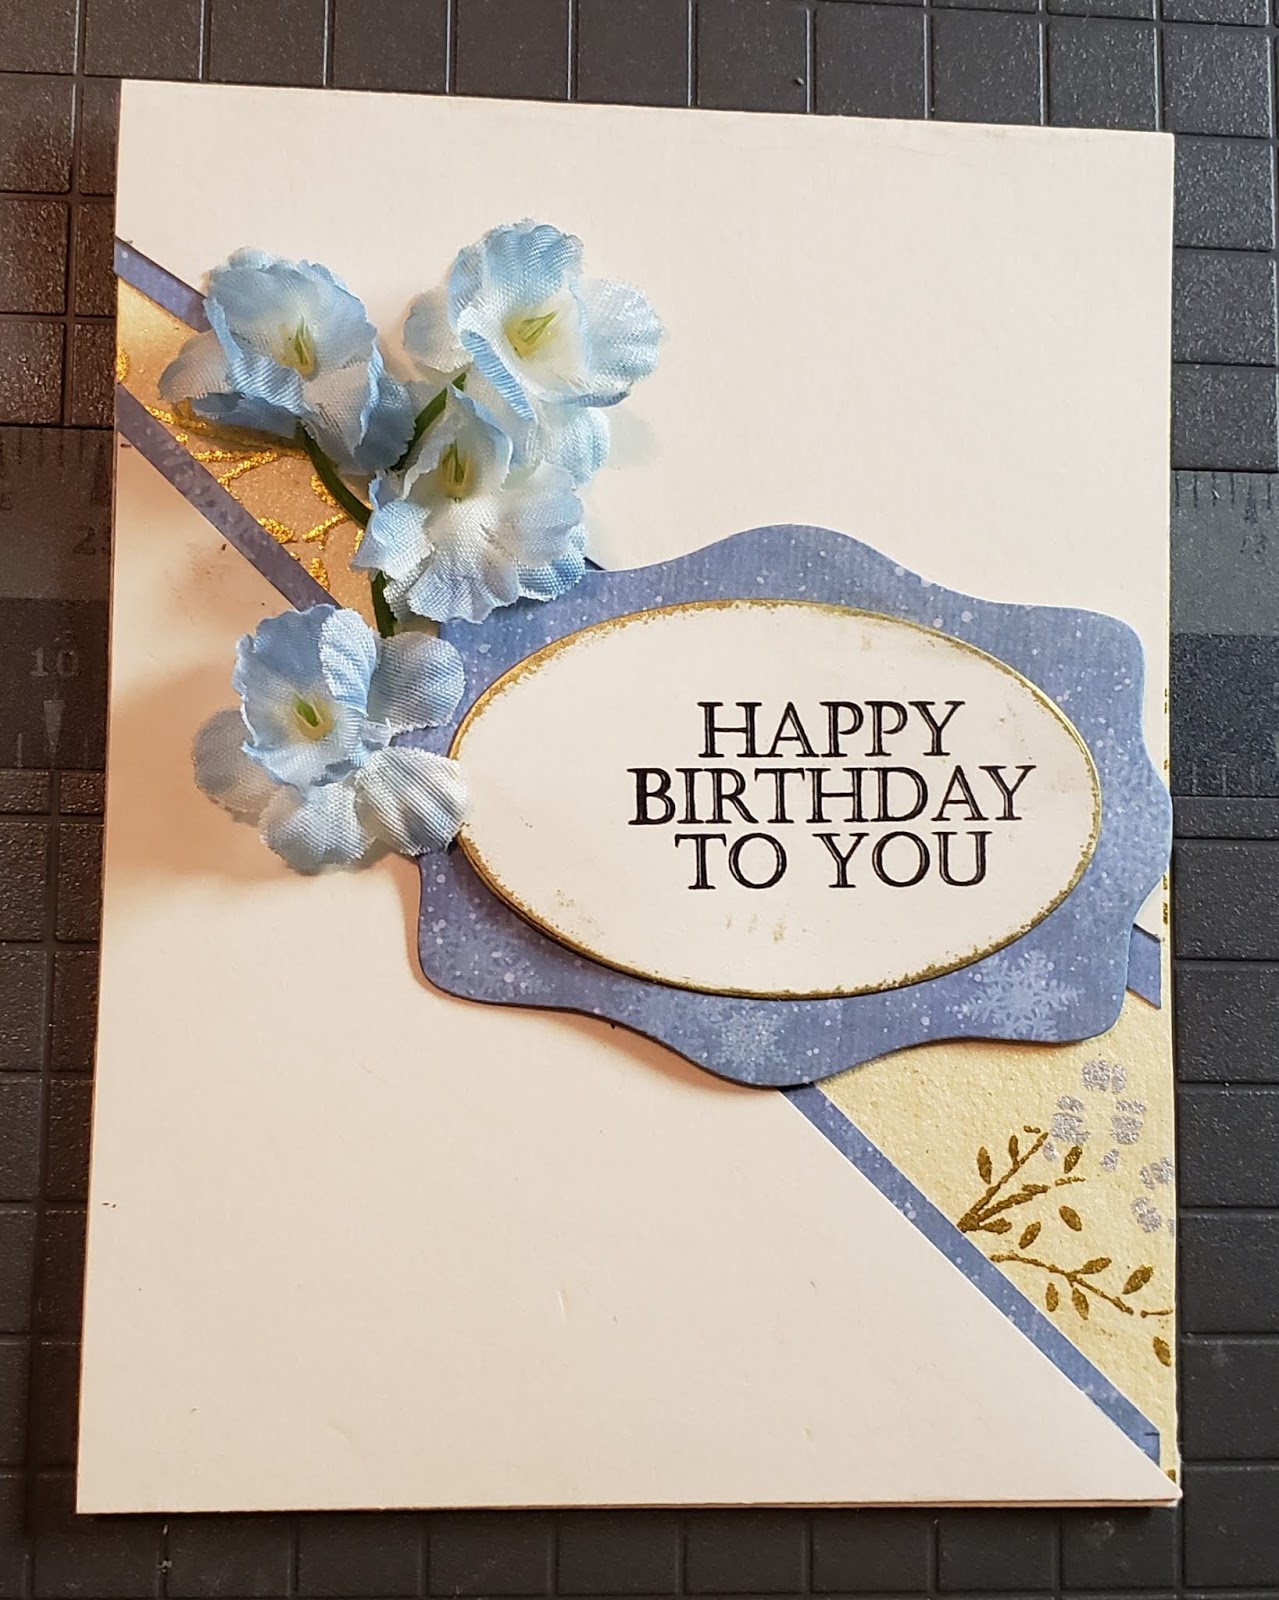
Recessed Panel Card


I was browsing on Pinterest and came across video from France Martin ( FrenchieStamps)   
for a Recessed Panel Card.  So, of course! I had to make one!


Mine is really more of a sample card since the front is a bit plain for my taste, but I do like it and will most likely give it to someone if I need a card in a hurry.  I pulled things out of my stash of supplies as I was putting this card together and didn’t pay attention to brands or set names.  The silk flowers were a small bit that I nearly threw away when I was unpacking my supplies – I’m glad now that I didn’t.

Even though there is a bit of fussiness to this card due to the measurements you need to make, it is easy to put together. After you finish one, any more that you make will be a breeze to complete!

Friday, May 31, 2019

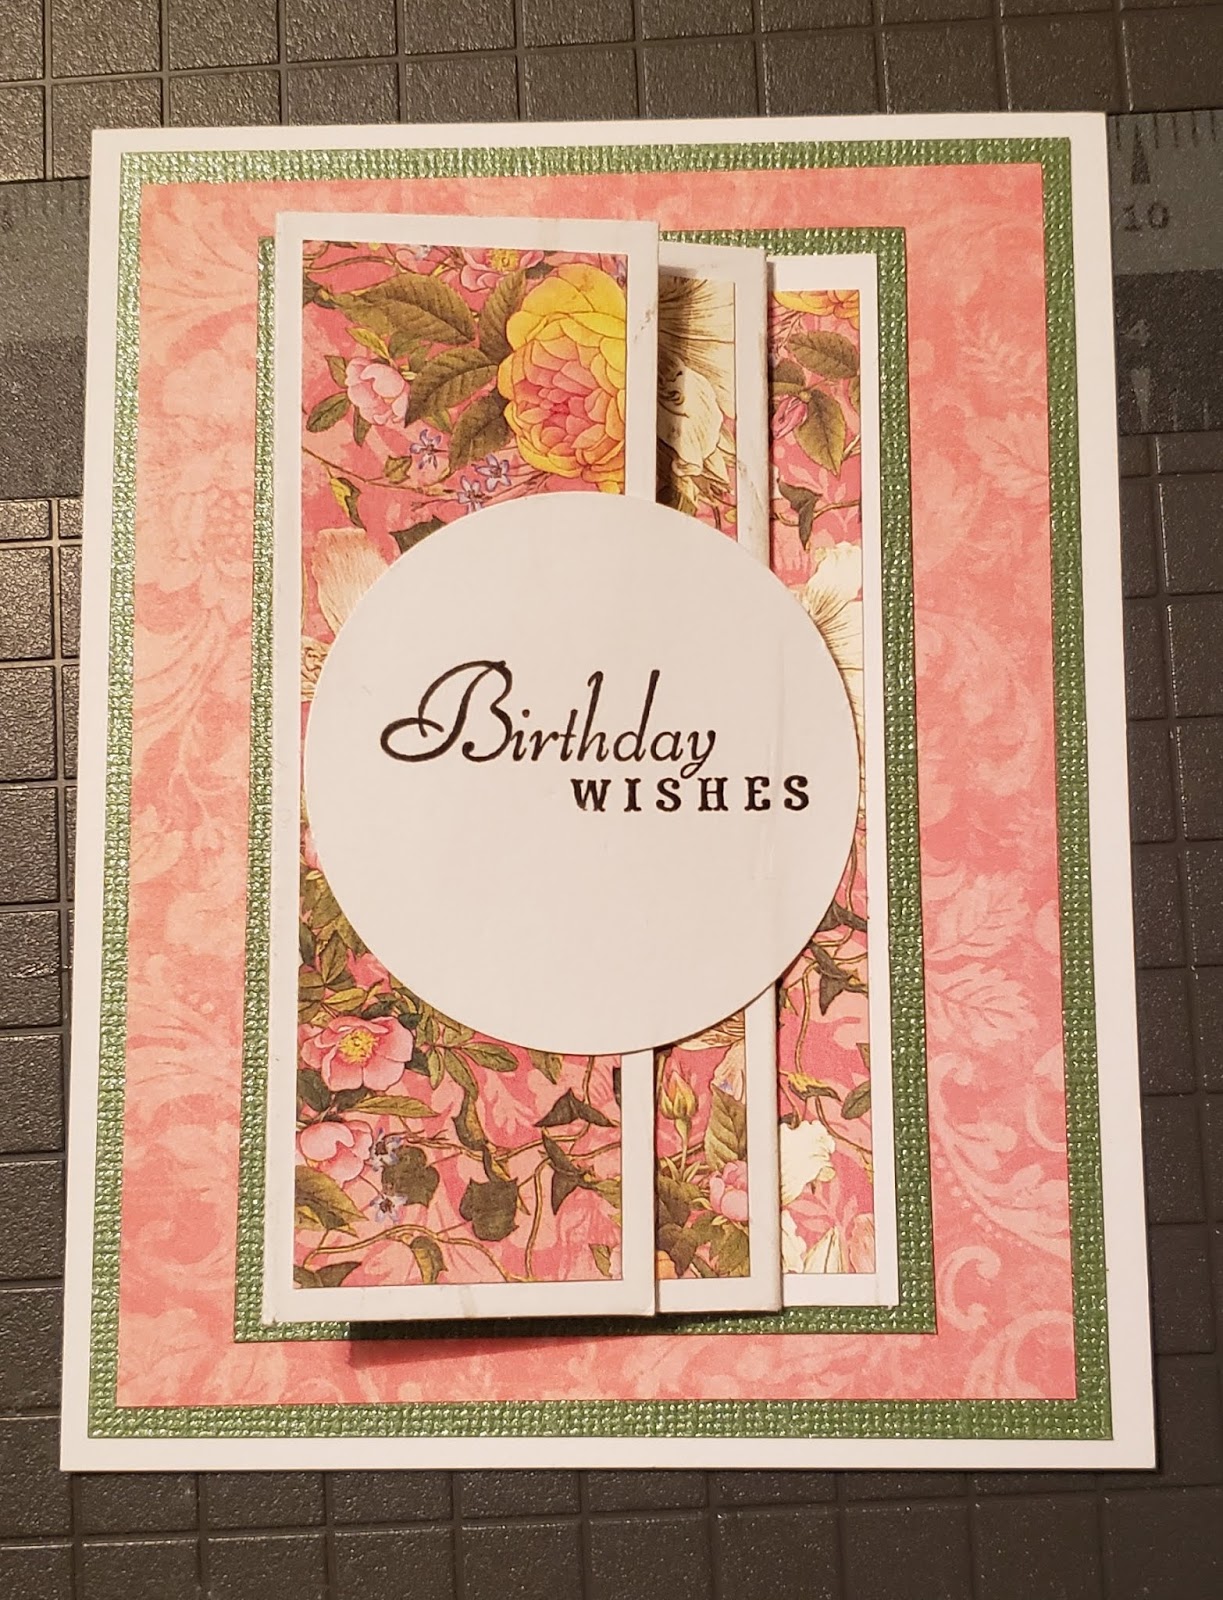
Pictures, as promised!

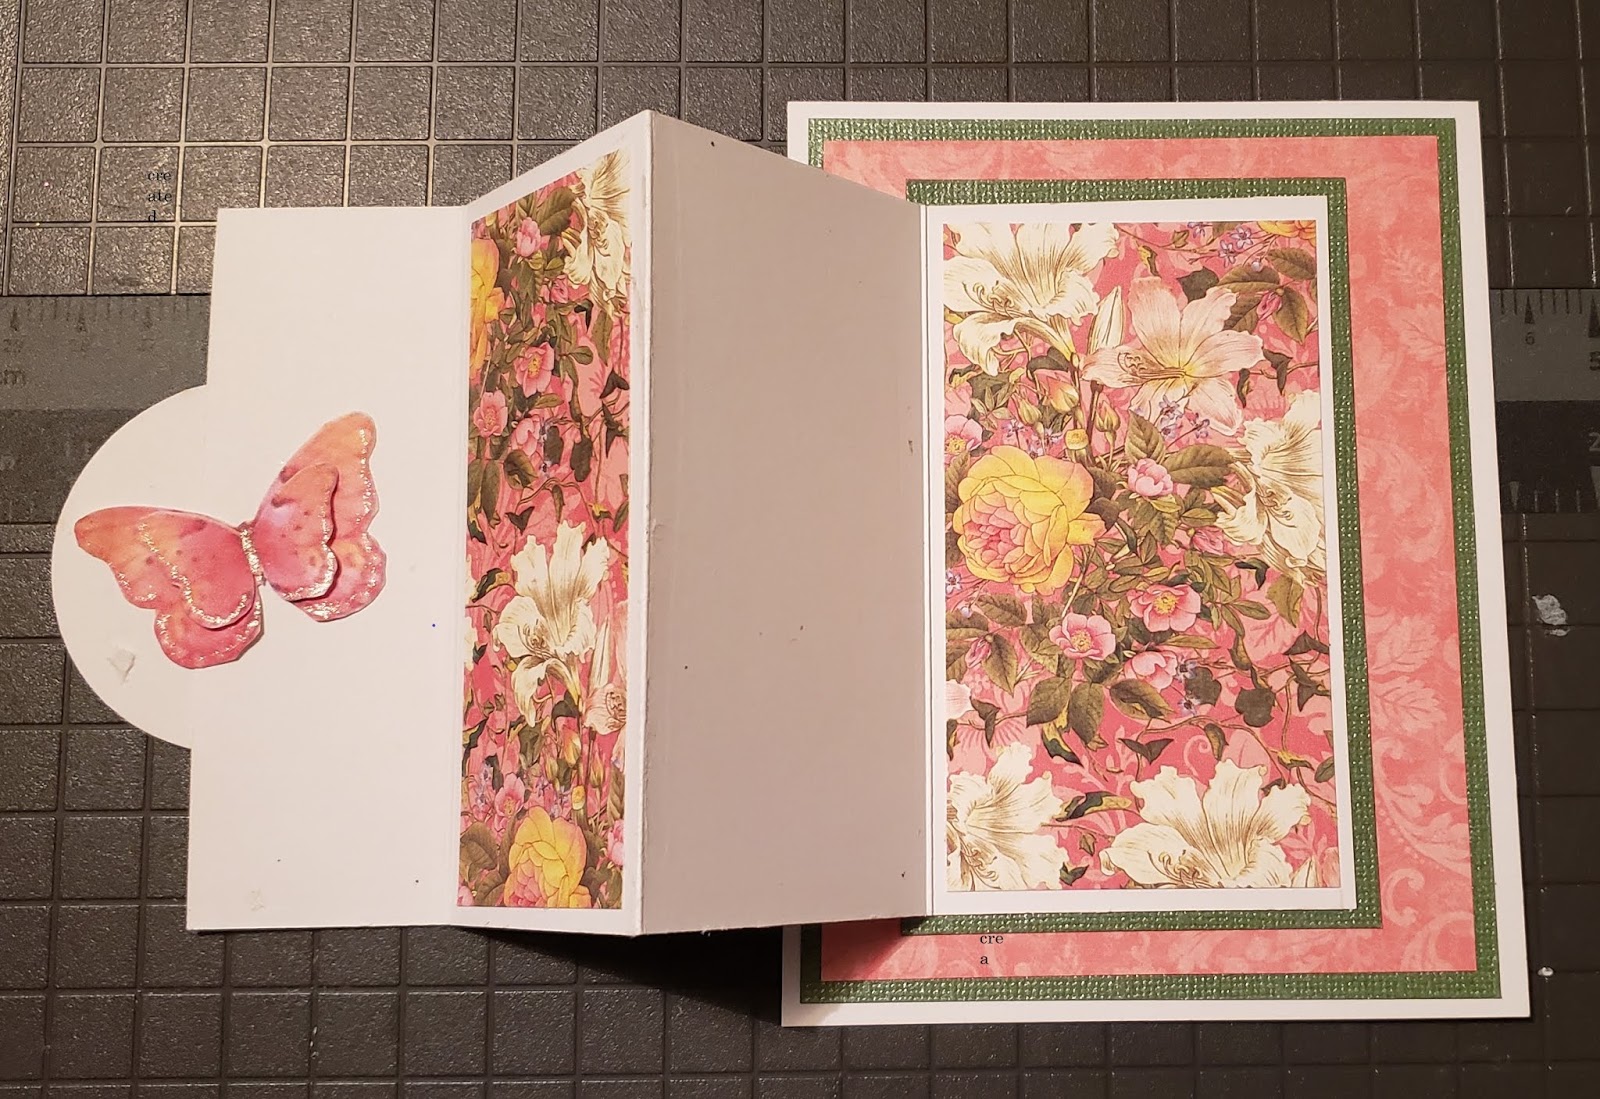
Here are a couple of pictures of one of the most recent cards I made. This a a Panel Pull Out Card and is very easy to make.  It definitely has that WOW! factor that cardmakers are looking for!


The designer paper is from Graphic 45. The white base is Neenah. The sentiment is a stamp that I have had quite a while but I don't remember the name of the set it was in.

The one thing I learned from making this card was to use a lighter weight cardstock for the scored panel. A lighter weight cardstock will stay closed much better than the heavy weight card.

Tuesday, May 28, 2019

Time to Return!

Nearly three years since my last post, oh my!  So much has happened but I'll keep it short.

Let's see, in February 2017, I was transferred to a different project which meant a move. I moved in with my brother  (supposedly only temporarily) and had to put most of my things, including a lot of my art supplies, into storage. It got to the place where I only made cards when absolutely necessary, i.e. Christmas and birthdays. It wasn't enjoyable since I didn't have the elbow room I needed in order to create.

The days, weeks, and months went by and I stopped actively looking for my own place.  And then things changed earlier this year.  My Dad went into the hospital at the end of January; he was only at home for maybe eight days from the day he first went to the hospital until late-March when he came home under Hospice care.  My brother's girlfriend and her son moved in. Thankfully, the girlfriend is in the medical field and she jumped right in helping to take care of Dad during his final earthly days. I don't know what we would have done without her!

I think the stress of my Dad being in the hospital for so long, his final Hospice care, and then his passing finally got to me the day of his Celebration of Life. I started feeling ill at the cemetery and it took nearly three weeks before I was feeling "almost human" again.   It wasn't until then that I actively started looking for  and subsequently found my own place.

So, I moved at the beginning of this month.  I am STILL unpacking and it seems like it will never end! It's been difficult trying to fit furniture and art supplies that were once in a large 2 bedroom unit into a 1 bedroom unit that is about half the size. I have discarded a lot of things and have donated at least 5 large boxes of stuff to Goodwill. Oh, and I have another donation box started as well as a large box of art supplies that will be donated to the Community Center where my Mother goes.

So much for keeping this short!   I don't have any pictures of cards to share today, but I will return in the next day or so with at least one picture.  So, please stay tuned for the next episode of Robin's Ramblings. 😄