Showing posts with label Fun Stamper's Journey. Show all posts

Tuesday, August 23, 2016

Die Embossing and Rock 'n Roll Tecnhiques

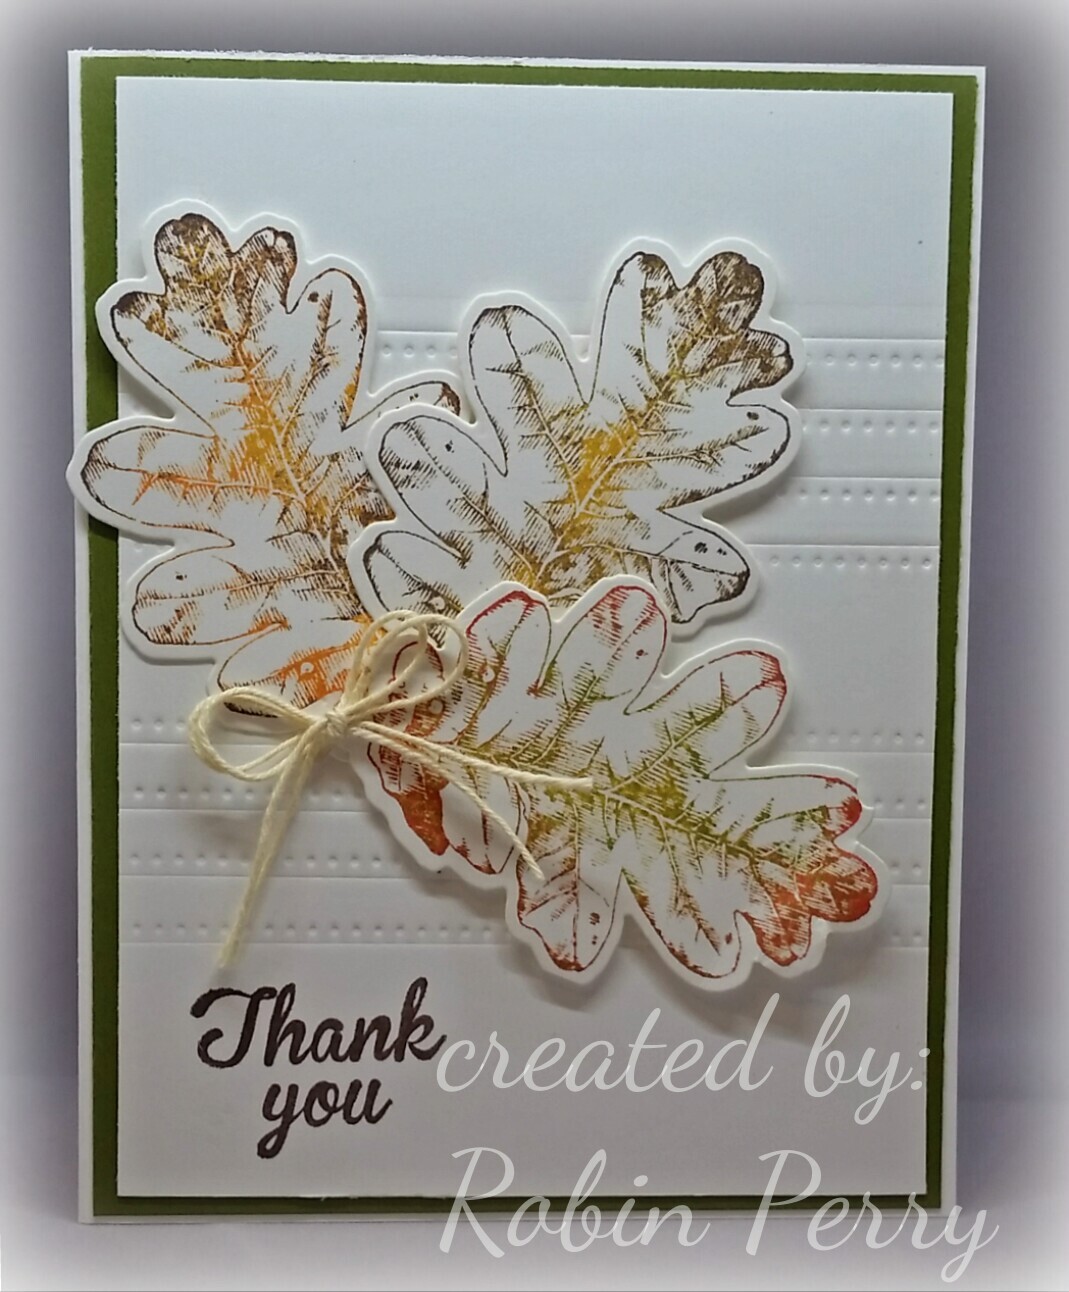
I watched a video by Jennifer McGuire where she highlighted the “Die Embossing” technique with layering dies.  I was fascinated and ran to my art studio to give it a try with my Fun Stampers Journey dies. This is the end result of my studio play time!

I don’t have the circle or oval dies (yet!), but I do have the rectangle and long rectangle piercing die sets.  I decided to use the long rectangle dies, so I laid them out & placed a few pieces of scotch tape on the non-cutting side to hold them together.

It took a few tries to get the right sandwich combination for my Grand Caliber die cutting machine. This is what works in my machine (bottom to top): Base Plate, Tan Embossing Mat, Cardstock, Taped-together Dies (cutting side down), Adapter Plate & a shim that was cut from a manila folder.   It didn’t feel tight when it was rolled through my machine, but the embossing came out beautifully.

Now that I had an embossed piece of cardstock, I had to decide what I was going to do with it. I thumbed through my Fun Stampers Journey stamp sets looking for the perfect set to work with my embossed piece.  Ah ha!  I have matching dies for the Autumn Days (SS-0006) set.

 I used Fun Stamper’s Journey Pineapple Smoothie ink on the oak leaf stamp, then “rock ‘n rolled” the following colors on top of the Pineapple Smoothie ink: Green Olive, Rich Coral, and Dark Roast to get the variegated colors.  I used the matching dies to cut the leaves out – so much faster than fussy cutting!

The bottom leaf is glued down flat at the stem end & the top of the leaf is popped up; I placed the tape close to the edge of the image. The second leaf has more tape toward the top so that it pops up more than the bottom leaf.  The leaf on top has tape all over it and a double layer of tape at the top for extra dimension.

The sentiment came from the Summer Garden (SS-0078) set and was stamped in Dark Roast ink. The panel was glued onto a piece of Green Olive cardstock and that panel was glued onto a Whipped Cream card base.  I tied a length of twine into a double bow & used a glue dot to adhere it to the card front.

Tuesday, July 26, 2016

Fun Stamper's Journey, "Tickled Pink"

This card is for this week’s Try a New Technique Challenge on Splitcoaststampers.com.  The challenge was to create a  “Bordered Sentiment” card.  I have been seeing quite a few cards with flamingos lately & they have been “growing on me.”  So, I decided to use Fun Stamper’s Journey Tickled Pink set for the card.


Here is the finished card


After stamping the sentiment onto a piece of Fun Stamper’s Journey  Whip Cream cardstock, I drew the border lightly with a #2 pencil & masked it off using blue painter’s tape.  I stamped the flamingo first & colored it.  I masked the image before stamping the tree trunk & palm fronds.   I drew the coconuts using different colored markers to add shading.  Once that was done, I colored in the palm fronds and tree trunk.  

Once that was done, I carefully peeled off the painter’s tape & stamped the three flowers & leaves on the right side above the sentiment.  Then I went over the pencil marks with a marker to create the border & erased the remaining marks that were inside the flower petals.   I water colored the sand and sky with marker ink & my watercolor pen.

Ugh, I did not like this card after all that work!  The left side of the bordered area was empty and I didn’t like how the flowers looked.  So, I stamped five more flowers & eight leaves on a piece of scrap cardstock, water colored them, then fussy cut them out. After that was done, I glued them onto the card & added a bit of glimmer to the yellow centers & sentiment using Sakura gold & clear glitter pens.

When I was happy with the card front, I trimmed it down to 4” x 5-1/4”. I layered it on top of a piece of Sweet Berry cardstock that was cut to 4-1/8” x 5-3/8” and glued that entire piece onto a card base of Black Licorice cardstock.  (8-1/2” x 5-1/2”, scored at 4-1/4” to create the base).

You can purchase the cardstocks and Tickled Pink (SS-0265) stamp set on my Fun Stamper’s Journey page,