Wednesday, August 11, 2021

My niece is turning 4!

 So, one of my nieces is turning 4 in a couple of weeks.  She is such a cutie-patootie!  She is a spitfire combination of "girly girl" who loves hair bows, horses, & mermaids and "tomboy" who romps around playing in the dirt with her brothers and dogs!


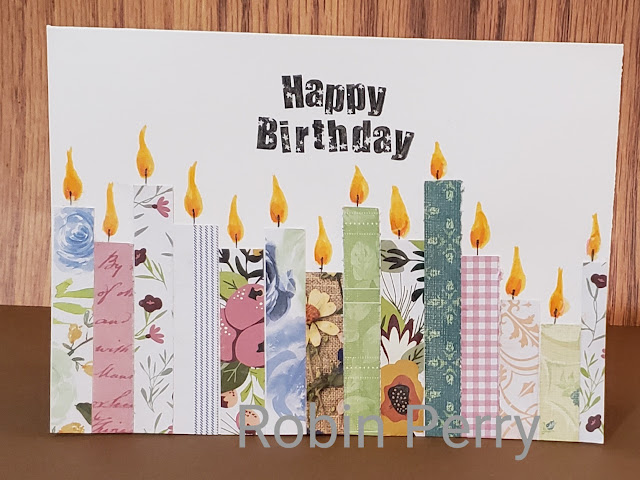
Here is the card that I made for her.


I followed a recent YouTube tutorial from Sam Calcott, Mixed Up Crafts, where she made several cards using up scraps. As soon as I saw Sam's Happy Birthday candles card, I knew I wanted to CASE it for my niece.  This was definitely a Clean and Simple (CAS) card that came together quickly. It took me longer to select the scraps than it did to actually complete the card!   It was so very satisfying to use up small pieces of patterned paper.

Most of the scraps are pattern papers from Fun Stampers Journey and a couple are from Stampin' Up!  I cut the scraps 1/2" wide by however long the scrap was.  I laid them out along the front until I was happy with the layout.  Before gluing them down, though, I stamped the sentiment with Ranger Archival black ink.  That way, I knew how much room I needed to leave in order to color in the candle flames. After gluing down the scraps, I cut off the paper that was hanging off the bottom of the card. It's not visible in the picture, but I colored over the flames and the sentiment with a clear glitter pen.

The finished size of this card is 5x7.


Tuesday, August 3, 2021

Masculine Birthday Card

Hello, Blog Friends!


Today's offering is a masculine card made from a tutorial from Sam Calcott, Mixed Up Craft, on YouTube. It is called a Vertical Easel Card.   Tutorial: https://www.youtube.com/watch?v=AvKLZOfprn8

The finished size of my card is 5x7.


Start with a piece of 10 x 7 cardstock for the base. Along the 10"" side, score at 2-1/2 and 5.  Both score lines are mountain folds.  Then put a narrow piece (popped up on foam tape) along the unscored 5"  section - this will create a ledge (so to speak) that the other edge can slide under & be supported to form the easel.  Sam explains in her tutorial how to make a support mechanism for the sentiment panel.

I hope you will give this card a try as it is very easy to make.


Wednesday, May 19, 2021

First Post of 2021

 So!  Here it is, more than a year after since my last post.  Oh my!  I certainly am lazy about keeping this blog current.  [sigh]


Last summer, I took a step out in faith and bought a cute little condo.  It is definitely small, but it is all I really need.  And I am quite comfortable.  My son helped me hang a ceiling fan recently - his comment was that I live in an art studio!  


Oh! Big news!  I did something I never thought I would do again - I signed up to be a Stampin Up! demonstrator.  It has been at least 10 years since I was with Stampin Up.  The sign up special for May was too good to pass up - since they are offering additional amount of product during the sign up special, I was able to purchase just about everything I wanted from the new catalog for the $99 cost. In a month or so, I'll order the rest of what I want from the catalog and get my demo discount!  That is a definite win for me.


Life has been good to me this past year. I was blessed that I was considered an essential worker during the covid pandemic. I did put on quite a bit of weight during that time, but I did manage to lose most of it since the beginning of this year.  Just a few more pounds to go and I'll be back to my pre-covid weight!  Gluten-free Keto diet and Weight Watchers is what helped me drop the weight.


More to come  so stay tuned ... I need to post some pics of cards that I made recently.