Showing posts with label FSJ. Show all posts

Tuesday, August 23, 2016

Die Embossing and Rock 'n Roll Tecnhiques

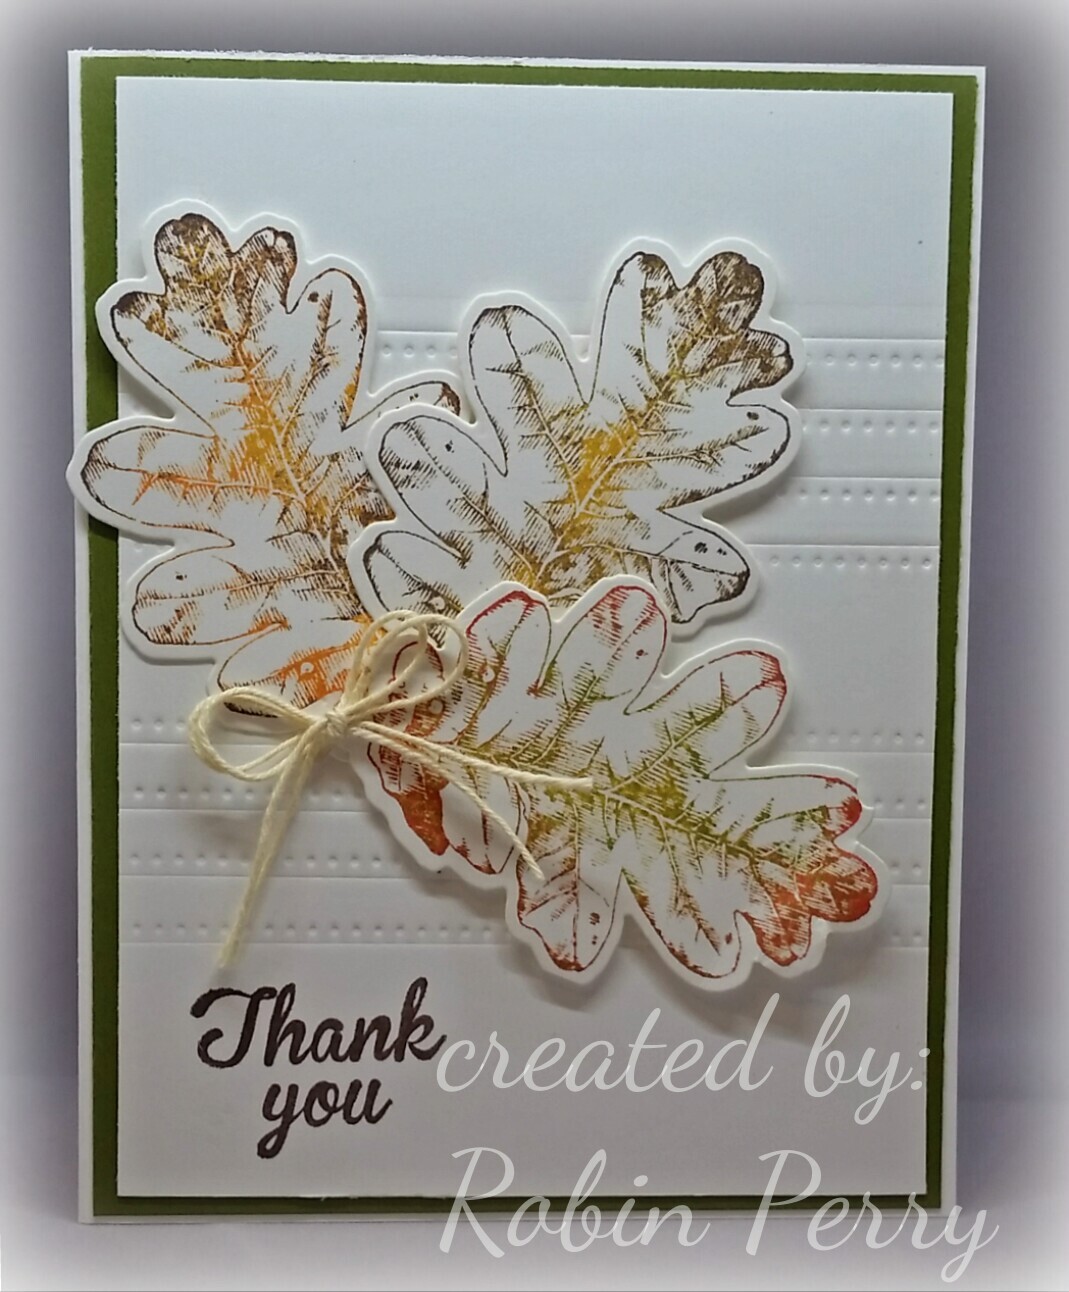
I watched a video by Jennifer McGuire where she highlighted the “Die Embossing” technique with layering dies.  I was fascinated and ran to my art studio to give it a try with my Fun Stampers Journey dies. This is the end result of my studio play time!

I don’t have the circle or oval dies (yet!), but I do have the rectangle and long rectangle piercing die sets.  I decided to use the long rectangle dies, so I laid them out & placed a few pieces of scotch tape on the non-cutting side to hold them together.

It took a few tries to get the right sandwich combination for my Grand Caliber die cutting machine. This is what works in my machine (bottom to top): Base Plate, Tan Embossing Mat, Cardstock, Taped-together Dies (cutting side down), Adapter Plate & a shim that was cut from a manila folder.   It didn’t feel tight when it was rolled through my machine, but the embossing came out beautifully.

Now that I had an embossed piece of cardstock, I had to decide what I was going to do with it. I thumbed through my Fun Stampers Journey stamp sets looking for the perfect set to work with my embossed piece.  Ah ha!  I have matching dies for the Autumn Days (SS-0006) set.

 I used Fun Stamper’s Journey Pineapple Smoothie ink on the oak leaf stamp, then “rock ‘n rolled” the following colors on top of the Pineapple Smoothie ink: Green Olive, Rich Coral, and Dark Roast to get the variegated colors.  I used the matching dies to cut the leaves out – so much faster than fussy cutting!

The bottom leaf is glued down flat at the stem end & the top of the leaf is popped up; I placed the tape close to the edge of the image. The second leaf has more tape toward the top so that it pops up more than the bottom leaf.  The leaf on top has tape all over it and a double layer of tape at the top for extra dimension.

The sentiment came from the Summer Garden (SS-0078) set and was stamped in Dark Roast ink. The panel was glued onto a piece of Green Olive cardstock and that panel was glued onto a Whipped Cream card base.  I tied a length of twine into a double bow & used a glue dot to adhere it to the card front.

Tuesday, July 26, 2016

Fun Stamper's Journey, "Tickled Pink"

This card is for this week’s Try a New Technique Challenge on Splitcoaststampers.com.  The challenge was to create a  “Bordered Sentiment” card.  I have been seeing quite a few cards with flamingos lately & they have been “growing on me.”  So, I decided to use Fun Stamper’s Journey Tickled Pink set for the card.


Here is the finished card


After stamping the sentiment onto a piece of Fun Stamper’s Journey  Whip Cream cardstock, I drew the border lightly with a #2 pencil & masked it off using blue painter’s tape.  I stamped the flamingo first & colored it.  I masked the image before stamping the tree trunk & palm fronds.   I drew the coconuts using different colored markers to add shading.  Once that was done, I colored in the palm fronds and tree trunk.  

Once that was done, I carefully peeled off the painter’s tape & stamped the three flowers & leaves on the right side above the sentiment.  Then I went over the pencil marks with a marker to create the border & erased the remaining marks that were inside the flower petals.   I water colored the sand and sky with marker ink & my watercolor pen.

Ugh, I did not like this card after all that work!  The left side of the bordered area was empty and I didn’t like how the flowers looked.  So, I stamped five more flowers & eight leaves on a piece of scrap cardstock, water colored them, then fussy cut them out. After that was done, I glued them onto the card & added a bit of glimmer to the yellow centers & sentiment using Sakura gold & clear glitter pens.

When I was happy with the card front, I trimmed it down to 4” x 5-1/4”. I layered it on top of a piece of Sweet Berry cardstock that was cut to 4-1/8” x 5-3/8” and glued that entire piece onto a card base of Black Licorice cardstock.  (8-1/2” x 5-1/2”, scored at 4-1/4” to create the base).

You can purchase the cardstocks and Tickled Pink (SS-0265) stamp set on my Fun Stamper’s Journey page, 


Wednesday, July 20, 2016

Fun Stamper's Journey Poppy Days

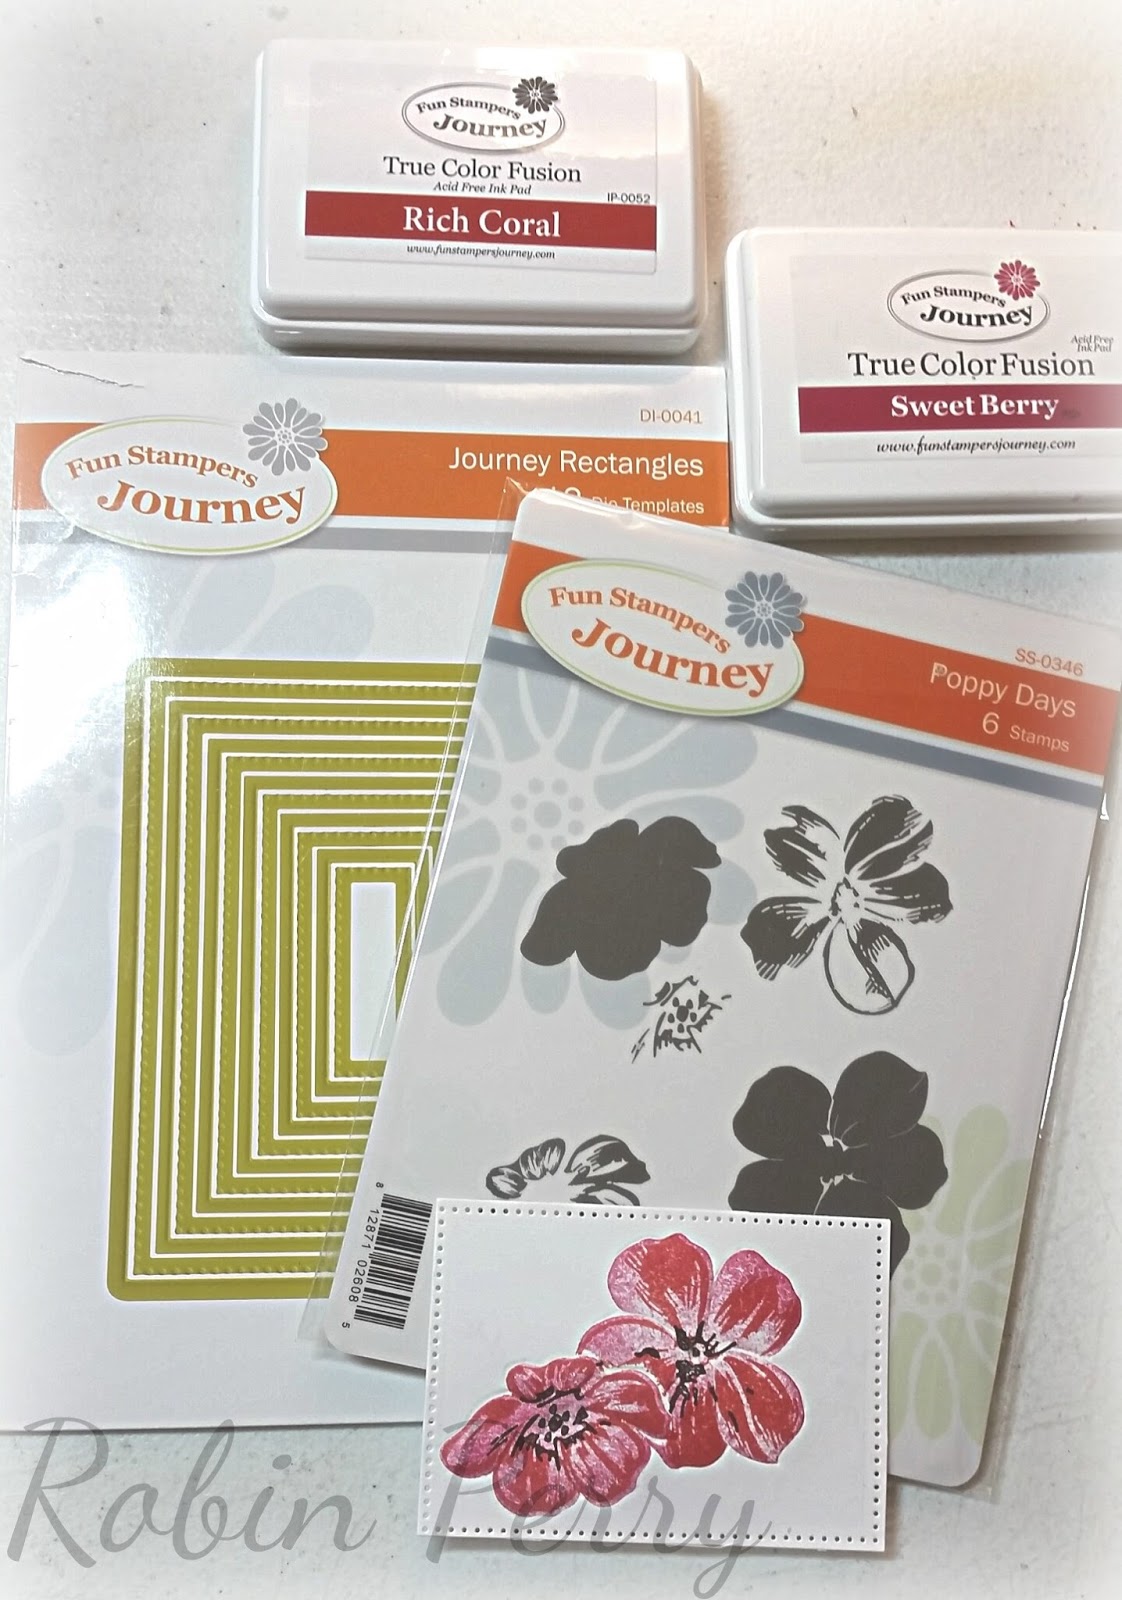
I received my first order from the 2016-2017 Fun Stamper's Journey catalog yesterday!  I am soooo excited!  I ordered two large stamp sets,several ATC's, and Pan Pastets (more on those to come).

The first thing I opened was the Poppy Days stanmpset!  I love poppies because they are so cheerful and easy to paint freehand.

Look at all that lucisouness!  I used all of those products to make the sample piece at the bottom of the picture.   I noticed, though, that I did not include tmy Fun Stamper's Journey Black Licorice inkpad.

Here is a close up of the sample


This is a multi-step stamp set. You start with the lightest color and build up to the darkest color.

If you love this set as much as I do, you can click on  This Link to my Fun Stamper's Journey page to order it.

Monday, July 11, 2016

Giveaway - Fun Samper's Journey $25 Gift Certificate

Wow!  Here's a fabulous opportunity to win a $25 gift  certificate from Fun Stamper's Journey!

Go to the the Scrapbbok Expo Freebie Friday post and leave a comment.  One luicky winner will receive a $25 gift certificate AND a catalog!

Thursday, May 12, 2016

Another Art Impressions Watercolor Card


Yep, I’m obsessed!   Today’s picture is another practice piece that I did using Art Impressions style of watercoloring.

The container is a stamp from Fun Stamper’s Journey that is on the  retiring list; it is available for 40% off (until supplies last)  


I only inked the container part of the stamp using a Marvy LePlume marker then stamped it onto 140 lb watercolor paper. Then I used Art Impressions stamps from the floral and foliage basics sets to create the rest of the image using green and violet LePlume markers. I used a die to cut the frame using Fun Stampers Journey Pretty Amethyst and Rock Candy cardstocks.   I used a Sizzix die to make an easel stand so that this picture will stand up.

Below are links the Art Impressions stamps that I used.  These are affiliate links to Amazon.


Tuesday, March 8, 2016

MMTPT398


This is my card for today's Teapot Tuesday challenge on Spltcoaststampers,com. This week, our cards are going out to Mrs, Utterback in Alderson, WV.  Mrs. Utterback will be celebrating her 103rd  birthday soon!

I apologize for the brevity of today's post ... I am going to type the recipe for rhe card and leave this post at that.

Recipe:

Cardstock - Fun Stamper's Journey
Ink - Stazon black, Memories sand
Stamps - Cornish Heritage Farms (poppy), Fiskars (jar & frame around sentiment), Verve (sentiment)
Accessories - woodgrain embossing folder, blue sharpie pen (water in jar), Prismacolor pencils, scrap piece of clear plastic packaging material

Wednesday, March 2, 2016

MMTPT397


This is my card for this week’s Teapot TuesdayChallenge.  This week, our cards are going out to a Sister-SCS’er, Cheryl (cherylquilts).  The theme of this week’s challenge is “threads, pins, needles, patches.”  I took some creative license and expanded that into quilting since, according to Cheryl’s username, she is a quilter.  

Since I am in the middle of reorganizing my art studio (and it is a disaster area right now!), I wanted to keep to a simple card that didn’t require dragging out a lot of supplies.  While cleaning out my paper scraps earlier this week, I ran across a 6x6 pad of Basic Gray “Out of Print” designer paper that I had forgotten about.  The flowered sheet is perfect for a quilted motif – all I had to do was emboss it with my We R Memory Keepers 3D embossing folder. The black border is also from the same Basic Gray paper pad, so of course, it coordinates perfectly with the flowered paper.     Easy Peasy!


I had strips of both papers left over, so I used a border punch along the black piece. I flipped the flowered piece over and stamped on the white side. (I apologize, but I do not know what company the stamp is from.) I then glued the two pieces together, trimmed them to size, used my clear glitter pen over the sentiment, and popped up the piece with 3M mounting tape.  I found the Lindy’s Stamp Gang brass butterfly charm while cleaning and had set it on my desk.  Turns out that it was perfect for this card so I used teensy pieces of 3M mounting tape on the back & attached it to the card.

The card base is Fun Stamper’s Journey white cardstock and I used Archival Black ink.

Wednesday, February 24, 2016

Butterfly card


This is a card from my stash; I am sending it out in response to a card drive request on Splitcoaststampers.com.  I don’t remember much of the details but I wanted to share it because I haven’t posted anything for a few days.

The butterfly is a Joy Craft die and is available from Frantic Stampers   .  The image is Carved Damask (Product # [AT-0075]) from Fun Stamper’s Journey; you can order this stamp through my FSJ website.  It was stamped then heat embossed.  The image was cut with Spellbinders Label One and matted with a decorative Labels One.  I do not know the brand of the designer paper or the name of the collection that it is from.

Friday, February 19, 2016

Masculine Thinking of You


This is definitely a Clean And Simple (CAS) card!  And it was fairly quick, too.  I “copied and shared everything”  (CASE) This Card found on Stamp & Create With Sabrina .  I love the elegance of her card and I also like that it can be used for other occasions.

I used Fun Stamper’s Journey  Butter Cream cardstock for the base and all layers, so this card is very heavy  (just how I like them!).  I didn’t measure the image panel, but it looks like it is about 3” x 4”.  If you are CASE’ing my card, you might want to cut it a little larger & then trim as necessary.  


 The image comes from Technique Tuesday’s Greenhouse set; it is dated 2012 so it might not be available any longer.  I used Momento cat’s eye pads in Olive Grove for the stems and Rich Cocoa for the pod.  The sentiment is from Stampin’ Up Wetlands set and I used Fun Stamper’s Journey Black Licorice ink for it.  I then used a clear glitter pen over the word “Thinking” only.

I used Stampin’ Up Square Lattice embossing folder for the embossed layer. It was cut at 4-1/8 x 5-3/8, embossed, then trimmed to fit the card with an even border.   I used a piece of fun foam to pop up the image layer.  The solid backing from the fun foam will insure that the card will go through the mail and not be crushed.  

Tuesday, February 16, 2016

Valentine's Day Card


This is the card that I made for my Sweetie.  I can finally post it on my blog now that Valentine’s Day is over!  He doesn’t read my blog, but I was afraid that if I posted the card early, that would be the one time that he did …. and then the surprise would be ruined.

Without further ado, here are the deets about this card.

The image panel (Fun Stamper’s Journey Oatmeal Cookie cardstock) is cut to 4-3/4” x 6-3/4” then stamped with Stampin’ Up! Gorgeous Grunge using brown, red, and gray inks to create the background.  The hearts were punched with three different sized punches from Stampin’ Up Cherry Cobbler, Fun Stampers Journey Oatmeal Cookie & Black Licorice cardstocks, and an unknown patterned designer paper. I also used a Sizzix embosslit for the smaller embossed hearts.  The banner was stamped with a Sizzix stamp then cut out with the matching die and the sentiment is from Stampin’ Up’s Teeny Tiny Wishes set.  The sentiment is actually straight, so I snipped the edges of the rubber & shaped it into an arch when I put it on the acrylic block.

I used ink to distress the edges of the hearts and used Fun Stamper’s Journey's  Journey Glaze on top of the smallest hearts to make them look like glass. The twine is from a roll that I picked up at a thrift shop several months ago, so I have no idea what the brand is!

After the main image panel was complete and the glaze was dry, I layered it on top of Fun Stamper’s Journey River Stone cardstock that was cut to 4-7/8” x 6-7/8”.  This panel was then glued onto a 5” x 7” card base using Fun Stamper’s Journey Whipped Cream cardstock.


Thursday, September 10, 2015

Fun Stamper’s Journey Coach Challenge for September 2015

I am a Journey Coach (#382) for Fun Stamper’s Journey.  I am also the winner for my upline’s September coaches’ challenge.   My choices are to make a card with a stamp set that I have not used yet or to hold a party either online or in person.   Since I am in the process of finding a new place to live & move by the end of next month AND planning a 60th anniversary party for my parents, it is easier for me to create a card (or two!) with a previously unused stamp set.


This is the first card that I created:


I used bits and pieces of cardstock and designer papers from several monthly kits to create this card. The oval die cut piece as well as both pieces of designer paper came from kits.  I stamped the image onto vellum paper using Black Licorice ink.  After it dried, I flipped the image over and colored on the backside by dipping a blender pen onto the ink pad to pick up the colors.

After the inks were dry, I glued the piece onto the backside of the die cut piece of Whipped Cream cardstock and glued that on top of the piece of designer paper.  The edges on the piece of orange striped designer paper was distressed and then the design element was glued on.  This entire assembly was glued to the A2 card base. The finished size of this card is 4-1/4” x 5-1/2”.

I used the following stamp sets:   
     
Here is the recipe for this card:

Stamp sets: Wish in a Bottle (sentiment) Spring Days (image)
Ink: Fun Stamper’s Journey Licorice Black and Pineapple, Cat’s Eye olive green and rust
Paper / Cardstock:  Whipped Cream (white), Vellum, various Fun Stampers Journey designer papers, vellum       


Here is the second card that I made for this challenge:


I recently received the snowman and matching die but haven’t had an opportunity to use it yet. He is a cheery fellow and using the die makes it quick and easy to cut him out!     


I used a pierced rectangle die and next smaller size to die cut the rectangle frame. I stamped the snowman in Black Licorice ink on Whipped Cream cardstock, the die cut him out. He is colored using a blender pen dipped in inks.  I just cut a scrap of white cardstock in a curvy fashion to create the hillside.

After gluing the hillside to the back of the frame, I glued it down onto the navy blue cardstock (unfortunately, not Fun Stamper’s Journey cardstock).  I used a Sakura clear glitter pen to make the stars and then glued the frame assembly on top, stamped the sentiment, then glued on the snowman.   This was then glued onto an A2 card base; the finished size of the card is 4-1/4” by 5-1/2”.


I used the following stamp set and dies:


Here is the recipe for this card:
Stamp sets: Frosty Fun (image), Wish in a Bottle (sentiment), pictured above
Ink: Fun Stamper’s Journey Black Licorice, Cat’s Eye red, green, orange
Cardstock: Whipped Cream, unknown brand navy