Showing posts with label Masculine. Show all posts

Tuesday, August 3, 2021

Masculine Birthday Card

Hello, Blog Friends!


Today's offering is a masculine card made from a tutorial from Sam Calcott, Mixed Up Craft, on YouTube. It is called a Vertical Easel Card.   Tutorial: https://www.youtube.com/watch?v=AvKLZOfprn8

The finished size of my card is 5x7.


Start with a piece of 10 x 7 cardstock for the base. Along the 10"" side, score at 2-1/2 and 5.  Both score lines are mountain folds.  Then put a narrow piece (popped up on foam tape) along the unscored 5"  section - this will create a ledge (so to speak) that the other edge can slide under & be supported to form the easel.  Sam explains in her tutorial how to make a support mechanism for the sentiment panel.

I hope you will give this card a try as it is very easy to make.


Friday, October 18, 2019

Card Shower Request


I belong to a Facebook group called Random Acts of Cardness where we send cards out when a request for a card shower is posted.  Yesterday, I saw a post for a veteran who has been hospitalized for several weeks and is need of a “pick me up.”  It was late when I saw the request so I didn’t have time to make a card, but I did find one in my stash to send.


I’ve had this card for quite a while, so I’m glad I finally found a reason to send it out. I remember some of the details, so I’ll post as much info as I can.

The airplane stamp is from Prickly Pear – I stamped it in black permanent ink on white cardstock. I used markers to color the image, then fussy cut it out.   I do not know the brand of the tree stamp, but it is similar to one of the stamps in Stampin’ Up’s retired set, Lovely as a Tree. I stamped the trees with Stazon ink onto glossy cardstock. After the ink dried, I sponged around the trees with blue ink to create the sky – this gave the illusion of clouds. I sponged green ink along the ground to create the landscape.

The card front is 5-1/4” x 4” and is layered onto a piece of black cardstock measuring 5-3/8” x 4-18”.  The size of the finished card is A2, 5-1/2” x 4-1/4”.

Friday, October 4, 2019

MMTPT584


It has been a while since I’ve participated in a Teapot Tuesday Challenge over at Splitcoaststampers.com, so I figured it was time to jump back in!  This week’s  challenge  is to make a masculine card for a gentleman in Lakeville MA.  He likes fishing, and antique cars & trucks.

Here is my card:


I used an Impression Obsession stamp that is, in my opinion, an artistic rendering of a grill from an antique roadster with just a hint of Steampunk. I have fallen in love with Stampin Up’s color, Blueberry Bushel, so I used that color ink and cardstock to make a monochromatic card.  I used Stampin Up’s Pinewood Planks 3D embossing folder for the background texture. I die cut the sentiment three times & stacked them together to add more dimension. I’m not sure if you can see it, but I used Glossy Accents on the headlight and grill emblems.  

Tuesday, April 19, 2016

I'm Just a Wee Bit Late With This Post!


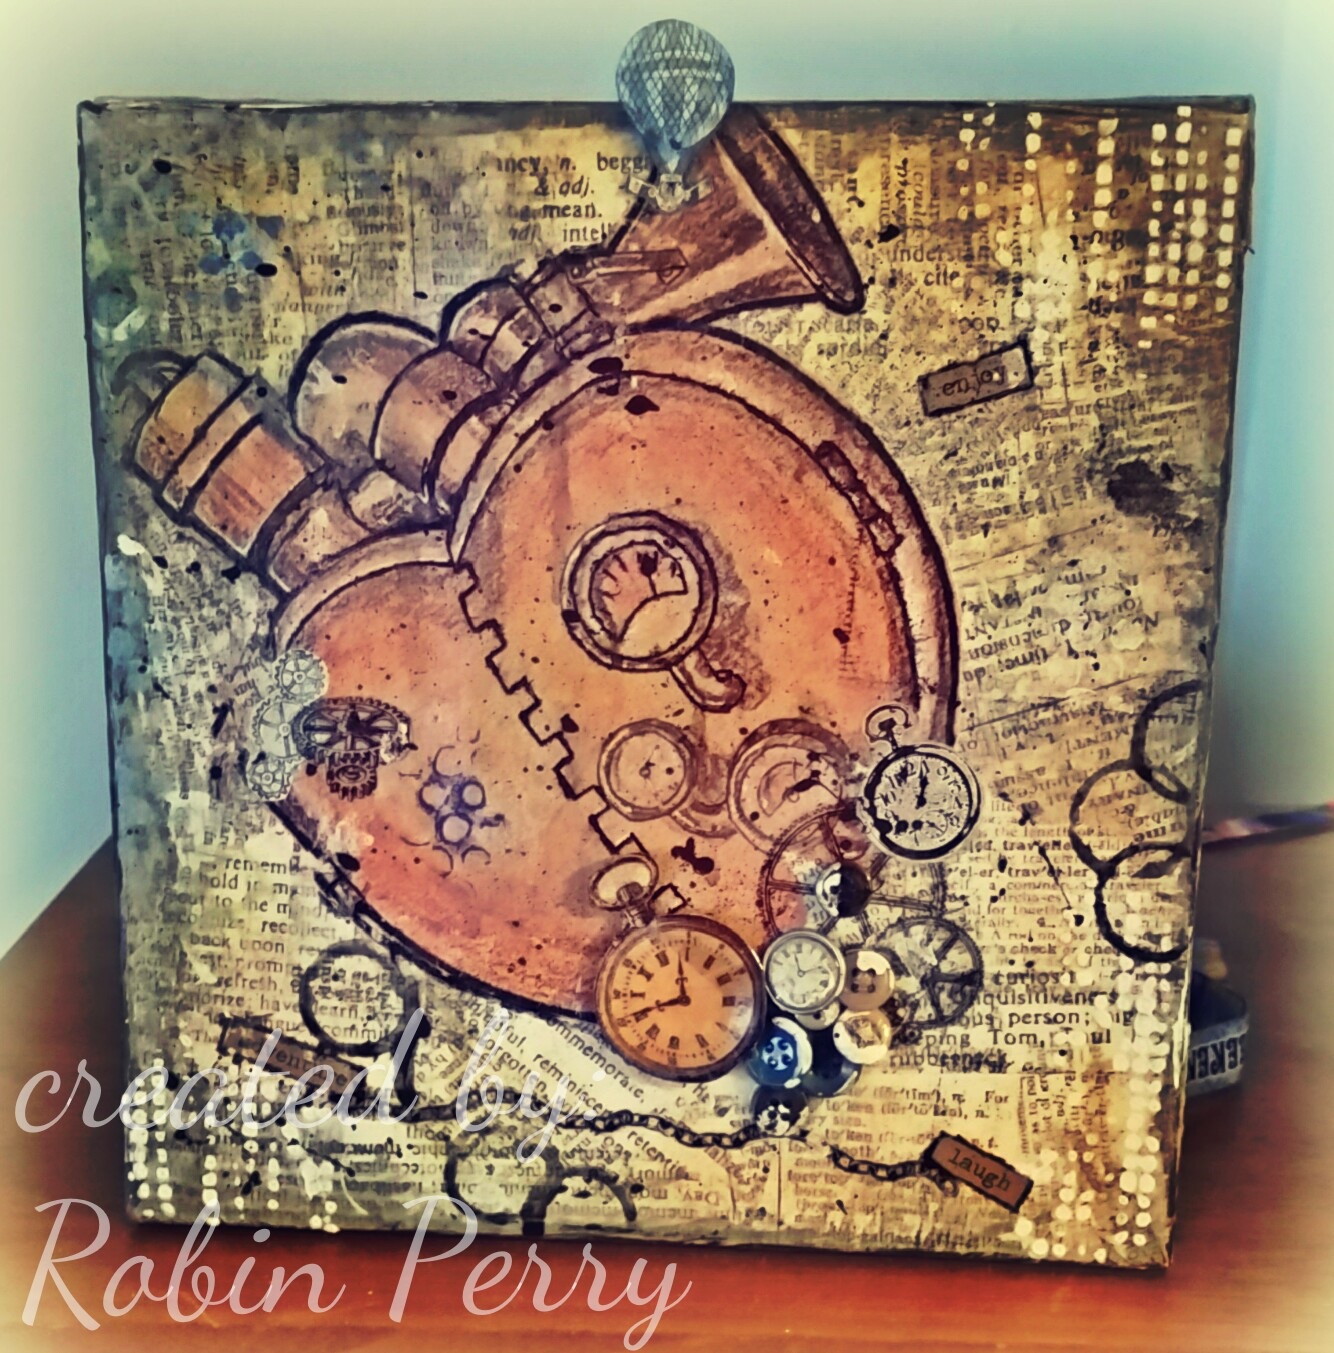
This is the Valentine's Day gift that I made for my Sweetheart.  He loved it!

I started the canvas at a mixed media class that I took at Bali Studios in Cocoa Beach, FL.  The owner, Sheri Stewart, is awesome!  She is an excellent artist, teacher, and friend!  If you have the opportunity to attend any of her classes, you should go! You will leave with a wonderful piece of art that you created.   Sheri can be found on Facebook at Bali Studios.

Anyway!   I printed  out  a free steampunk image (found here) and took it with me to the class. I also took a few other odds & ends that I found in my art studio that I thought might work.  The base of the canvas is torn scrapbook papers that are glued down with mod podge.  I cut out the steampunk image & glued it down on top of the scrapbook papers. I used the other "odds & ends" to decorate the canvas, then outlined the image with a black sharpie to give it more definition.

The pocket watch images were cut from scrapbook paper; the image on the left was covered with Glossy Accents from Stampin Up & glued on when it was dry. The cogs and chain at the bottom came from a sheet of rub-ons that I picked up at Tuesday Morning. The white dots were made by applying modeling past through a stencil.

This was a fun piece to make!

Friday, February 19, 2016

Masculine Thinking of You


This is definitely a Clean And Simple (CAS) card!  And it was fairly quick, too.  I “copied and shared everything”  (CASE) This Card found on Stamp & Create With Sabrina .  I love the elegance of her card and I also like that it can be used for other occasions.

I used Fun Stamper’s Journey  Butter Cream cardstock for the base and all layers, so this card is very heavy  (just how I like them!).  I didn’t measure the image panel, but it looks like it is about 3” x 4”.  If you are CASE’ing my card, you might want to cut it a little larger & then trim as necessary.  


 The image comes from Technique Tuesday’s Greenhouse set; it is dated 2012 so it might not be available any longer.  I used Momento cat’s eye pads in Olive Grove for the stems and Rich Cocoa for the pod.  The sentiment is from Stampin’ Up Wetlands set and I used Fun Stamper’s Journey Black Licorice ink for it.  I then used a clear glitter pen over the word “Thinking” only.

I used Stampin’ Up Square Lattice embossing folder for the embossed layer. It was cut at 4-1/8 x 5-3/8, embossed, then trimmed to fit the card with an even border.   I used a piece of fun foam to pop up the image layer.  The solid backing from the fun foam will insure that the card will go through the mail and not be crushed.  

Friday, January 29, 2016

My Brother's Birthday Card

My brother's birthday was this past week. When I talked to him on his actual birthday, he hadn't received his card yet due to the blizzard that hit the northeast over the weekend. Hopefully he has gotten it by now!   But he doesn't read my blog (he probably doesn't know that I have one!), so I am not worried that he will see it here before he gets it in the mail.


I enjoyed making this card. I wanted to make a scenic card built around the focal image stamp.   The trees in the background were stamped and drawn with various stamps.  The sentiment is an Elizabeth Craft Quietfire die.