Showing posts with label Stampin Up. Show all posts

Wednesday, October 23, 2019

MMTPT587


This week’s Teapot Tuesday Challenge at Splitcoaststampers.com is to make a card with flowers to cheer up a lady in Bentonville AR who is waiting for a kidney transplant.

Here is my card:

When I went into the drawer where my white cardstock is stored, I found a scrap that was a leftover piece from a die cut.  I already knew which stamp set I wanted to use (Fun Stampers Journey Thistle), so I was very happy when I saw that it fit onto the scrap!   I colored the stamp with Tombow markers and used my MISTI to stamp it. That was a good decision because I had to at least three different colors of blue markers to get the mason jar to show up!

After I stamped the sentiment, I inked a Stampin Up embossing folder then laid the green cardstock down & ran it through my Spellbinders Platinum machine. I was very happy with the results! I finished putting the card together by popping up the white die cut onto the green piece, then gluing the front onto the A2 card base.

Friday, October 18, 2019

Card Shower Request


I belong to a Facebook group called Random Acts of Cardness where we send cards out when a request for a card shower is posted.  Yesterday, I saw a post for a veteran who has been hospitalized for several weeks and is need of a “pick me up.”  It was late when I saw the request so I didn’t have time to make a card, but I did find one in my stash to send.


I’ve had this card for quite a while, so I’m glad I finally found a reason to send it out. I remember some of the details, so I’ll post as much info as I can.

The airplane stamp is from Prickly Pear – I stamped it in black permanent ink on white cardstock. I used markers to color the image, then fussy cut it out.   I do not know the brand of the tree stamp, but it is similar to one of the stamps in Stampin’ Up’s retired set, Lovely as a Tree. I stamped the trees with Stazon ink onto glossy cardstock. After the ink dried, I sponged around the trees with blue ink to create the sky – this gave the illusion of clouds. I sponged green ink along the ground to create the landscape.

The card front is 5-1/4” x 4” and is layered onto a piece of black cardstock measuring 5-3/8” x 4-18”.  The size of the finished card is A2, 5-1/2” x 4-1/4”.

Wednesday, August 14, 2019

Blast From the Past – Pocket Cards!


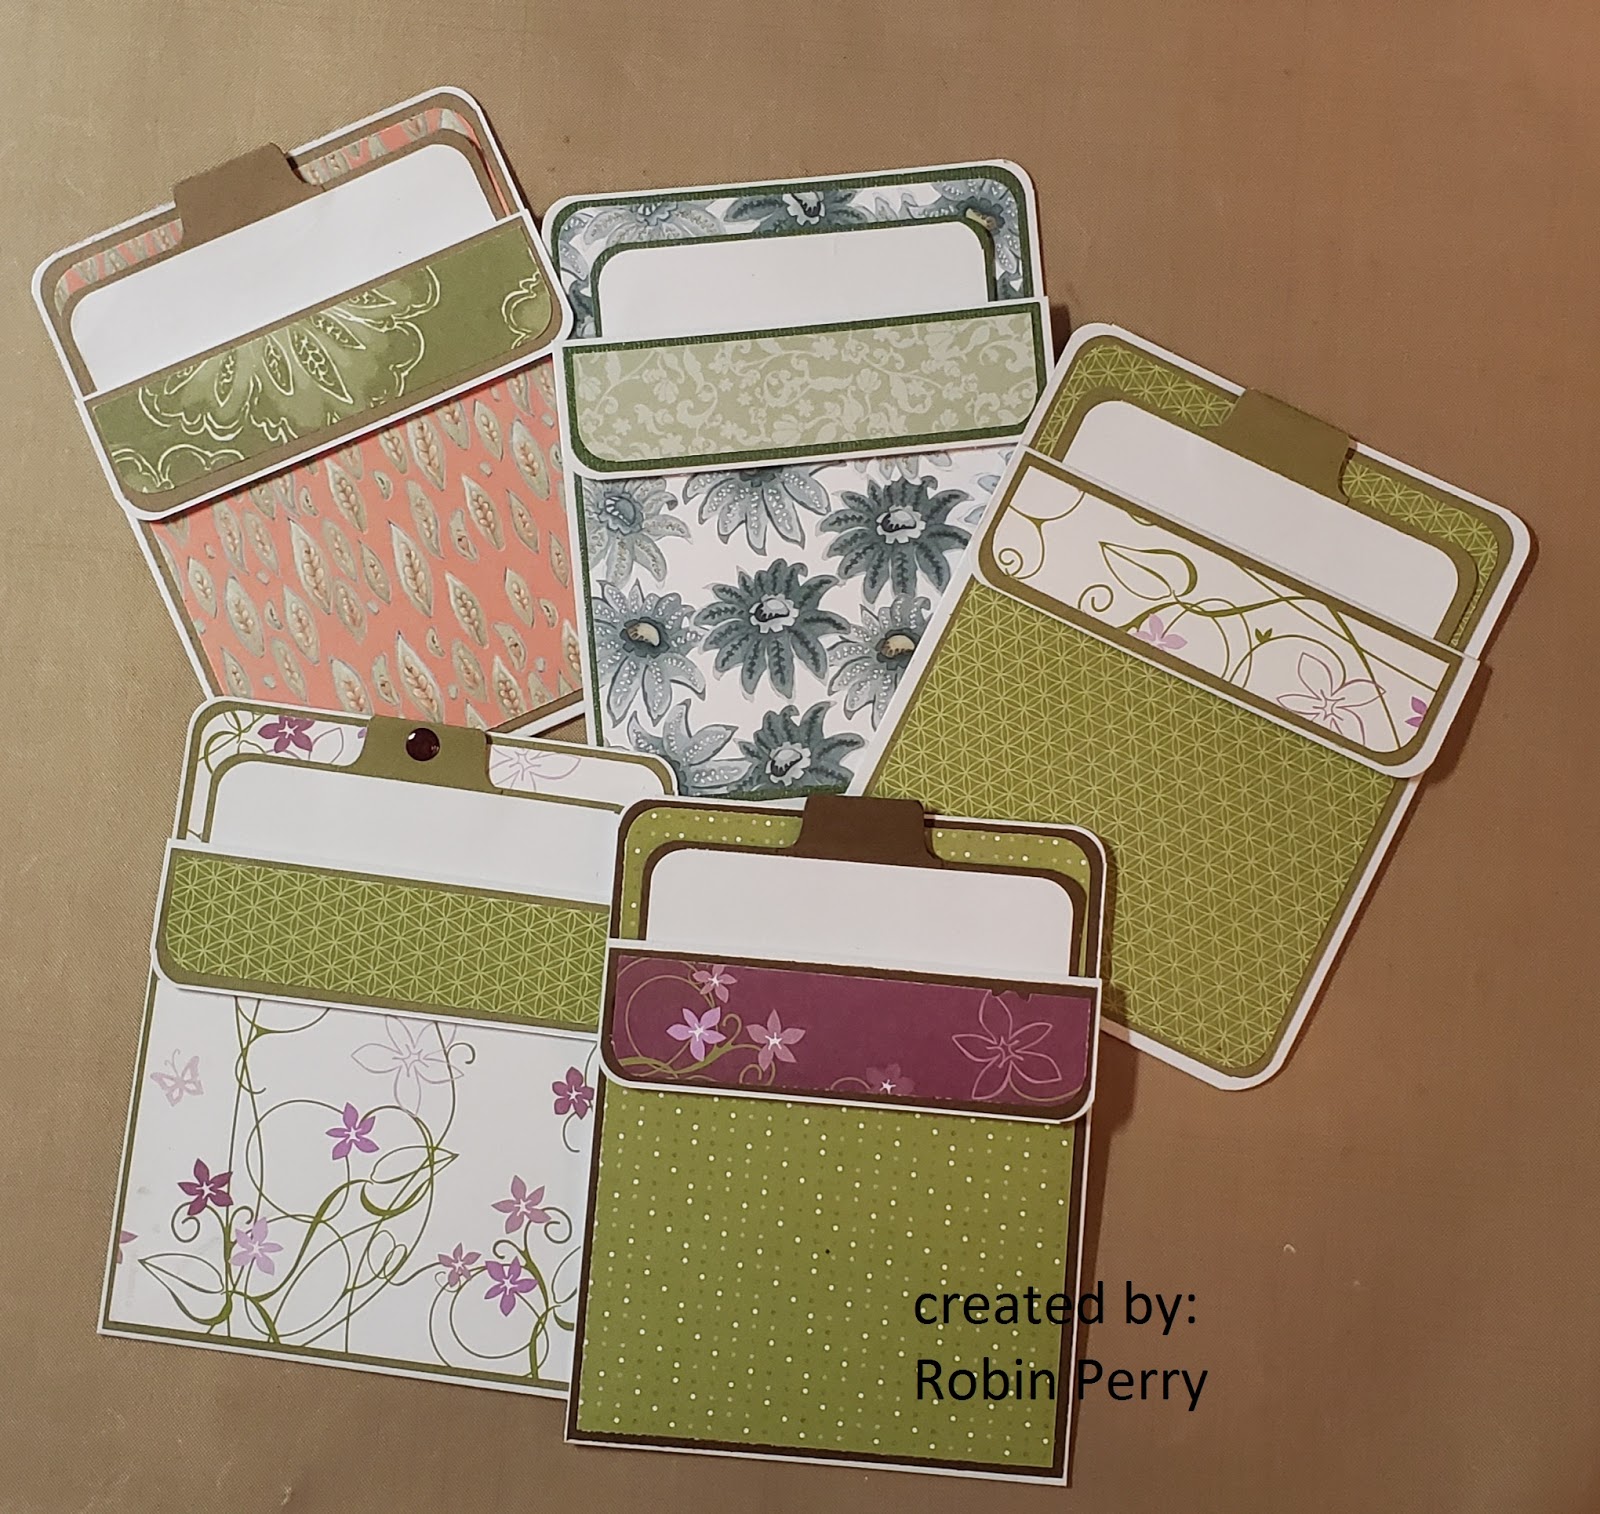
I was cleaning my studio and came across a note with rough information on creating a pocket card. Apparently this note was from 2008 because the first line on the paper was 2008 In Colors!  Well, as I was reading my note, I couldn’t visualize the end result, so I decided to try making one. 

Once I cut the paper to 4-1/2 x 11 and scored it at 1-1/4 & 
5-1/2, the light bulb over my head turned on!  It is a mountain fold at the 1-1/4 score line and a valley fold at the 5-1/2 score line & glued together along the sides.  That creates the pocket, which can then be decorated and stamped.  I made several and used up some scraps of old Stampin Up designer papers.  The size of the base layer of the insert is 3-3/4 x 5.

Here is a pic of most of the cards that I made. These cards are going into my stash – I’ll stamp an appropriate sentiment and decorate them more when I know who each card will be going to.


Then, I got to thinking about how to make a 5 x 7 pocket card.  I tried cutting a piece of cardstock to 7 x 10, but then realized that it could not be scored and folded to create the pocket.  So, I cut the cardstock  along the long side at 5 inches, & scored one of the pieces along the short side at 2 inches. I folded down the flap (mountain fold) and used 1/8” score tape (along the sides and bottom) to adhere it to the back panel.  

Here is a picture of the card that I will most likely be sending to my granddaughter later this year.  She is not a girly-girl, so no flowers!  I may add a bit of glitter to the balloons, though, because the card is just too plain for me!


This is the inside pocket. The sentiment is a wood mounted stamp that I have had for years & I have no idea what brand it is.  I used a Spellbinders gift tag die set to create the pocket on the left side; I'll slip in some money and a gift card for her.


Wednesday, June 19, 2019

Teapot Tuesday Challenge (MMTPT569) at Splitcoaststampers.com


I made this card last night for the Teapot Tuesday challenge at Splitcoaststampers.com.


Our cards for this week’s challenge are going to Jonesboro, AR to the grandparents of a 12 year old young man who recently lost his battle with cancer.

This is a standard A2 card. I used a scrap of designer paper for the two rectangles and layered them onto olive green cardstock.  The center panel was dry embossed with an embossing folder then layered onto the same olive green cardstock.  The sentiment was stamped with Hero Arts black ink; I then went over “Sympathy” with a gold glitter pen.

Tuesday, February 16, 2016

Valentine's Day Card


This is the card that I made for my Sweetie.  I can finally post it on my blog now that Valentine’s Day is over!  He doesn’t read my blog, but I was afraid that if I posted the card early, that would be the one time that he did …. and then the surprise would be ruined.

Without further ado, here are the deets about this card.

The image panel (Fun Stamper’s Journey Oatmeal Cookie cardstock) is cut to 4-3/4” x 6-3/4” then stamped with Stampin’ Up! Gorgeous Grunge using brown, red, and gray inks to create the background.  The hearts were punched with three different sized punches from Stampin’ Up Cherry Cobbler, Fun Stampers Journey Oatmeal Cookie & Black Licorice cardstocks, and an unknown patterned designer paper. I also used a Sizzix embosslit for the smaller embossed hearts.  The banner was stamped with a Sizzix stamp then cut out with the matching die and the sentiment is from Stampin’ Up’s Teeny Tiny Wishes set.  The sentiment is actually straight, so I snipped the edges of the rubber & shaped it into an arch when I put it on the acrylic block.

I used ink to distress the edges of the hearts and used Fun Stamper’s Journey's  Journey Glaze on top of the smallest hearts to make them look like glass. The twine is from a roll that I picked up at a thrift shop several months ago, so I have no idea what the brand is!

After the main image panel was complete and the glaze was dry, I layered it on top of Fun Stamper’s Journey River Stone cardstock that was cut to 4-7/8” x 6-7/8”.  This panel was then glued onto a 5” x 7” card base using Fun Stamper’s Journey Whipped Cream cardstock.


Thursday, January 28, 2016

Flower Card

I saw this card on Pinterest and fell in love with the stampset. It is now retired, so I had to find it on Ebay.  I was fortunate enough to get a good deal on it, though.

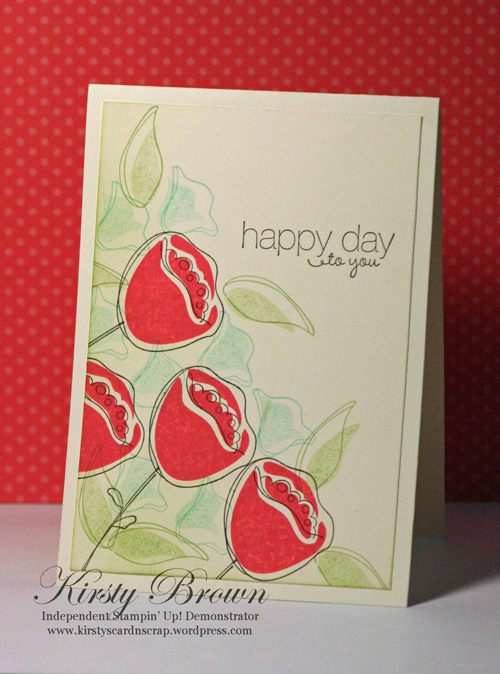
Here is my CASE  (Copy And Share Everything):

I used the same stampset, color scheme, and layout as the card from
Kirsty Brown's blog.  Most of the inks are Tim Holtz distress inks, so after I was finished stamping, I spritzed the image with water so that the inks would bleed and blend.

I  used Dee's Distinctively Dies "Thinking of You" die instead of stamping the sentiment.  I colored over the die cut with a clear glitter pen.