Wednesday, January 27, 2016

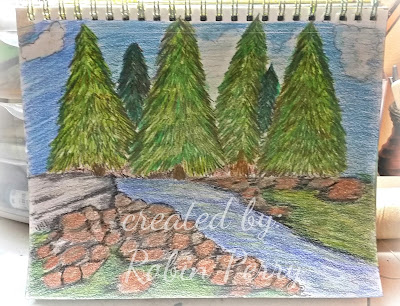
Forest Scene

I drew this forest scene several weeks ago, and  saw it again last night as I was flipping through my art journal . So I thought I would post it.


It was very easy!  I used colored pencils and followed This Tutorial that I found on Pinterest.  It's certainly not perfect, but I am happy with the results. 


Tuesday, January 26, 2016

Lasting Hearts Card Drive (update)

 Here are most of the cards that I sent to the Lasting Hearts card drive. The stamp & die set used on the cards in the first pic were purchsed from Simon Says Stamps.  


These cards are also posted on my Pinterest "My Cards" board

Tuesday, January 19, 2016

Lasting Hearts - Card Drive

Instead of rewriting all of the information, I thought it would be easier to post a link to Sandy Alnock's blog post about the card drive for Lasting Hearts:

Sandy Alnock - Lasting Hearts


Lasting Hearts is a ministry for families who have lost a child due to a miscarriage.  The grief is real and can be long lasting, as I know all too well after having lost a baby due to an ectopic pregnancy in 1989.

If you feel led to donate some cards to Lasting Hearts, here are a few guidelines from the Give Forward page seen here:

Cards with "Thinking of You," "Hugs,"  or "Sorry For Your Loss" as the sentiment are probably best.

You can either leave the inside blank, or sign it very simply. A suggested signature is  "You are in my thoughts and prayers" and then your first name and state.

Put the cards inside unsealed envelopes.

The address to mail the cards is:
              2892 N Bellflower Blvd Ste 216              
              Long Beach Ca 90815


Thank you.


Monday, January 11, 2016

Happy Anniversary


This is the card that I sent to my stamping friend and her husband for their wedding anniversary.  It was a quick and simple white-on-white card, but it sure did help jump start my creative mojo that took a vacation over the holidays!

Card size – 5-1/2" square
Paper – Stampin’ Up 2015 Sale-A-Bration DSP, Georgia Pacific base
Accessories – Tim Holtz die (sentiment) and Darice die (foliage)


Tuesday, January 5, 2016

Happy New Year! My Word for 2016

Wow!  Time is flying by  (just like my mother told me it would when I was a kid  lol)

My word for 2016 is "Focus."   There are things that I need & want to focus on and they are:

1. My relationships with God, family (immediate and extended), and friends 

This is especially true for the man in my life.  We are two very different types of people and so it makes our relationship interesting, especially given that we live in separate homes.  He is a night owl and I am an early bird. He works long hours, so he is more relaxed about keeping his house tidy and I am somewhat of a neatnik!

My talent & ministry is cardmaking so I want to send out more cards througout the year. More than birthdays, anniversaries, or Christmas; I want to send cards for no reason other than I was thinking about that person.  I also want to donate more cards to local organizations such as assisted living facilities for the residents to use or charitable organizations that serve animals.

2. My finances  

I want to pay down my credit card debt this year; the best way to do that is to take control of my spending habits and "shop" from my stash of art supplies first.

Paying down my credit card debt will free up money so that I will be able to donate more money to my favorite animal charity, The Mr. Mo Project .  This organization saves senior dogs from shelters around the country, finds fosters for the dogs, then pays for the transportation to get the dog to the foster, AND they pay all of the dog's medical bills for the rest if its life.

3. My art and my blog  

Once again, I have let life get in the way of both. I am not going to commit to posting here every day or even every week, but I do want to make a concerted effort to post more often.  However, one commitment that I can make is to spend time every week day in my studio, even if it is just to clean up or reorganize.

4. "Lighten My Load"  

This is an ongoing project and one that I will make progress, even if just baby steps, if I shop my art stash first.  I have joined a Facebook group called 40 Bags in 40 Days and read the posts daily as added inspiration to lighten my load.  My 40 day start date is tomorrow, Jan 6th, and my plan is to start in my art studio.


So, there you have it, Friends. In my mind, putting this into print seems to solidify my accountability.

Tuesday, October 13, 2015

MMTPT376

This is my card for today’s Teapot Tuesday challenge onSplitcoaststampers.com.  This week, our cards are going out to Patty in Valencia, CA. Sadly, Patty recently lost her husband to cancer.


I was so busy last evening working on a Christmas project that I completely forgot about the Teapot challenge! So, I looked through my Pinterest boards before work this morning and decided to CASE this card:


It took about 30 minutes to make, including deciding on the designer paper. I cut two pieces of DSP  and one piece of cream to 1-3/4” x 3” then matted them with black cardstock that was cut to 2” x 3-1/4”  I stamped the sentiment and then popped that panel up using fun foam.  I also lined the inside with matching cream cardstock.  The finished size of the card is 5-1/2” by 4-1/4”

Recipe:
Stamps: Verve
Cardstock: Fun Stampers Journey cream and black,  unknown brand DSP
Ink: Archival Black
Accessories: Fun Foam

Tuesday, September 22, 2015

Art Studio “Spring” Clean and Reorganization


I am excited to report that the “spring” cleaning in my art studio is done and it has been reorganized!

It turns out that I will not be moving this year (and that makes me very happy).  The property manager will be doing an inspection of the condo this week before issuing a new lease and that prompted me to really dig in and clean my art studio.   Even after the packing that I had already done in anticipation of moving, I still spent at least 3 hours in there last Sunday.  I tossed a lot of scrap paper and other stuff that I know I will never use.

I had a small Iris cart in my bedroom closet that didn’t have much in it, so I emptied it & moved it to my art studio closet. It now holds my Stickles & reinkers. Two of the drawers are still empty, but that probably won’t last long! I’m sure I will find something to store in there.

I didn’t unpack everything that belongs in my studio. I figured those were things I don’t use often, so I put the boxes in the storage room.  If I need something, I can get it from the box, use it, & then decide if it needs to stay in the studio.


When I was finished, it was a relief as well as a huge sense of accomplishment!  Now, I don’t want to make anything because I don’t want to mess up my studio!  Last night, I just sat in there for a few minutes and enjoyed the cleanliness. Every time I walk past the door, I pause, look in the room, and smile.  J

Thursday, September 10, 2015

Fun Stamper’s Journey Coach Challenge for September 2015

I am a Journey Coach (#382) for Fun Stamper’s Journey.  I am also the winner for my upline’s September coaches’ challenge.   My choices are to make a card with a stamp set that I have not used yet or to hold a party either online or in person.   Since I am in the process of finding a new place to live & move by the end of next month AND planning a 60th anniversary party for my parents, it is easier for me to create a card (or two!) with a previously unused stamp set.


This is the first card that I created:


I used bits and pieces of cardstock and designer papers from several monthly kits to create this card. The oval die cut piece as well as both pieces of designer paper came from kits.  I stamped the image onto vellum paper using Black Licorice ink.  After it dried, I flipped the image over and colored on the backside by dipping a blender pen onto the ink pad to pick up the colors.

After the inks were dry, I glued the piece onto the backside of the die cut piece of Whipped Cream cardstock and glued that on top of the piece of designer paper.  The edges on the piece of orange striped designer paper was distressed and then the design element was glued on.  This entire assembly was glued to the A2 card base. The finished size of this card is 4-1/4” x 5-1/2”.

I used the following stamp sets:   
     
Here is the recipe for this card:

Stamp sets: Wish in a Bottle (sentiment) Spring Days (image)
Ink: Fun Stamper’s Journey Licorice Black and Pineapple, Cat’s Eye olive green and rust
Paper / Cardstock:  Whipped Cream (white), Vellum, various Fun Stampers Journey designer papers, vellum       


Here is the second card that I made for this challenge:


I recently received the snowman and matching die but haven’t had an opportunity to use it yet. He is a cheery fellow and using the die makes it quick and easy to cut him out!     


I used a pierced rectangle die and next smaller size to die cut the rectangle frame. I stamped the snowman in Black Licorice ink on Whipped Cream cardstock, the die cut him out. He is colored using a blender pen dipped in inks.  I just cut a scrap of white cardstock in a curvy fashion to create the hillside.

After gluing the hillside to the back of the frame, I glued it down onto the navy blue cardstock (unfortunately, not Fun Stamper’s Journey cardstock).  I used a Sakura clear glitter pen to make the stars and then glued the frame assembly on top, stamped the sentiment, then glued on the snowman.   This was then glued onto an A2 card base; the finished size of the card is 4-1/4” by 5-1/2”.


I used the following stamp set and dies:


Here is the recipe for this card:
Stamp sets: Frosty Fun (image), Wish in a Bottle (sentiment), pictured above
Ink: Fun Stamper’s Journey Black Licorice, Cat’s Eye red, green, orange
Cardstock: Whipped Cream, unknown brand navy

Sunday, August 30, 2015

Still purging!

It is time to get really serious about purging my studio since I will be moving in a couple of months. I am tired of hauling all this stuff every time I move!

Last week, I filled a couple of good sized boxes with punches, 12x12 designer paper, a few wood mounted stamps, & a lot of ribbon and took them to an elementary school that is located in the southern part of the county. it felt good to know that these things went somewhere where they will be used.  I had some of the items for almost five years!  If I hadn't used them by now, it's obvious that I never would.

Next up for purge are stamps and stamp sets.

Woohoo!

Tuesday, August 11, 2015

Studio Purge Continues!

No pictures today, but rather some rambling thoughts!

I am still working (albeit slowly!) on purging my studio.  The other day, I went through all of my punches and pulled out quite a few that I know I will never use.  Some are brand new and/or having matching stamp sets.  Those stamp sets were pulled off the shelf and added to the pile.  A couple of the punches and matching sets have already been posted on the "Purge to Splurge" group on Facebook.   More will be added later to that group.

I keep putting off going through all of my patterned paper. There is way too much of it!  I know I will feel better getting rid of paper that I bought years ago and have never used.

Last night, I started a Christmas card using the July 2015 paper collection from Heartfelt Creations.  It will be a nice card once it's finished.  I like how Heartfelt Creations makes printed card fronts that you can cut out, embellish & stamp, then glue onto a card base.