Wednesday, February 24, 2016

Butterfly card


This is a card from my stash; I am sending it out in response to a card drive request on Splitcoaststampers.com.  I don’t remember much of the details but I wanted to share it because I haven’t posted anything for a few days.

The butterfly is a Joy Craft die and is available from Frantic Stampers   .  The image is Carved Damask (Product # [AT-0075]) from Fun Stamper’s Journey; you can order this stamp through my FSJ website.  It was stamped then heat embossed.  The image was cut with Spellbinders Label One and matted with a decorative Labels One.  I do not know the brand of the designer paper or the name of the collection that it is from.

Friday, February 19, 2016

Masculine Thinking of You


This is definitely a Clean And Simple (CAS) card!  And it was fairly quick, too.  I “copied and shared everything”  (CASE) This Card found on Stamp & Create With Sabrina .  I love the elegance of her card and I also like that it can be used for other occasions.

I used Fun Stamper’s Journey  Butter Cream cardstock for the base and all layers, so this card is very heavy  (just how I like them!).  I didn’t measure the image panel, but it looks like it is about 3” x 4”.  If you are CASE’ing my card, you might want to cut it a little larger & then trim as necessary.  


 The image comes from Technique Tuesday’s Greenhouse set; it is dated 2012 so it might not be available any longer.  I used Momento cat’s eye pads in Olive Grove for the stems and Rich Cocoa for the pod.  The sentiment is from Stampin’ Up Wetlands set and I used Fun Stamper’s Journey Black Licorice ink for it.  I then used a clear glitter pen over the word “Thinking” only.

I used Stampin’ Up Square Lattice embossing folder for the embossed layer. It was cut at 4-1/8 x 5-3/8, embossed, then trimmed to fit the card with an even border.   I used a piece of fun foam to pop up the image layer.  The solid backing from the fun foam will insure that the card will go through the mail and not be crushed.  

Tuesday, February 16, 2016

Valentine's Day Card


This is the card that I made for my Sweetie.  I can finally post it on my blog now that Valentine’s Day is over!  He doesn’t read my blog, but I was afraid that if I posted the card early, that would be the one time that he did …. and then the surprise would be ruined.

Without further ado, here are the deets about this card.

The image panel (Fun Stamper’s Journey Oatmeal Cookie cardstock) is cut to 4-3/4” x 6-3/4” then stamped with Stampin’ Up! Gorgeous Grunge using brown, red, and gray inks to create the background.  The hearts were punched with three different sized punches from Stampin’ Up Cherry Cobbler, Fun Stampers Journey Oatmeal Cookie & Black Licorice cardstocks, and an unknown patterned designer paper. I also used a Sizzix embosslit for the smaller embossed hearts.  The banner was stamped with a Sizzix stamp then cut out with the matching die and the sentiment is from Stampin’ Up’s Teeny Tiny Wishes set.  The sentiment is actually straight, so I snipped the edges of the rubber & shaped it into an arch when I put it on the acrylic block.

I used ink to distress the edges of the hearts and used Fun Stamper’s Journey's  Journey Glaze on top of the smallest hearts to make them look like glass. The twine is from a roll that I picked up at a thrift shop several months ago, so I have no idea what the brand is!

After the main image panel was complete and the glaze was dry, I layered it on top of Fun Stamper’s Journey River Stone cardstock that was cut to 4-7/8” x 6-7/8”.  This panel was then glued onto a 5” x 7” card base using Fun Stamper’s Journey Whipped Cream cardstock.


Monday, February 15, 2016

White Pencil Highlighting


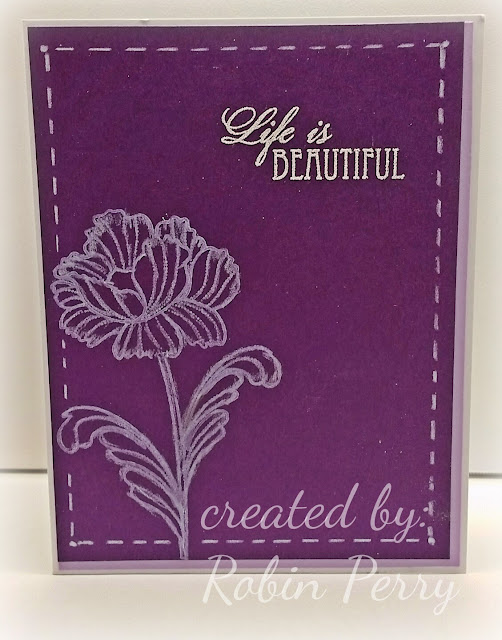
I have been wanting to try Jennifer McGuire’s White Pencil Highlighting technique  ever since watching her video from Feb 5th.    I needed a card for a friend’s mother, so I finally decided to try it last night.

My first attempt was not good at all, so it ended up in the trash.  It was so bad that I didn’t want to take a pic!  I used a floral background stamp, white pigment ink, and a white stabilo pencil; the details of the stamp got lost and it ended up looking like a mess of white lines.  Yuck!

I looked through my floral stamps and finally settled on an image from Penny Black’s Petal Party stamp set.  And! I was doing the Happy Dance after I found a white Prismacolor pencil in with all my other colored pencils!   I used Colorbox white pigment ink for the image and stamped it on the left side of the Fun Stamper’s Journey Pretty Pansy cardstock. I followed Jennifer’s instructions on using with the white pencil to feather and soften the ink. I liked this one sooo much better than the first one! 

I stamped one of the sentiments from the same stamp set with Versamark ink then heat embossed it with detail white embossing powder.  Then, I decided it was too stark and plain so I thought I would use Fun Stamper’s Journey Pretty Amethyst cardstock to layer underneath the image.   I decided to do something different and lay the front so that only the right side and bottom edges of the Pretty Amethyst cardstock was showing.

Oh. My Goodness!  This card is just not making me happy at this point.  I like CAS (clean and simple) cards, but this one was far too CAS.  It also almost ended up in the trash can!  Since this card really needed some help (and fast!), I figured that making a frame around it with the white pencil couldn’t hurt. 

Eureka!  THAT was what the card needed!  It makes me smile now, and I sure do hope it will put a smile on my friend’s mother, too!   

Tuesday, February 9, 2016

MMTPT394 Butterflies for Carolyn

https://www.pinterest.com/pin/24910604167734606/


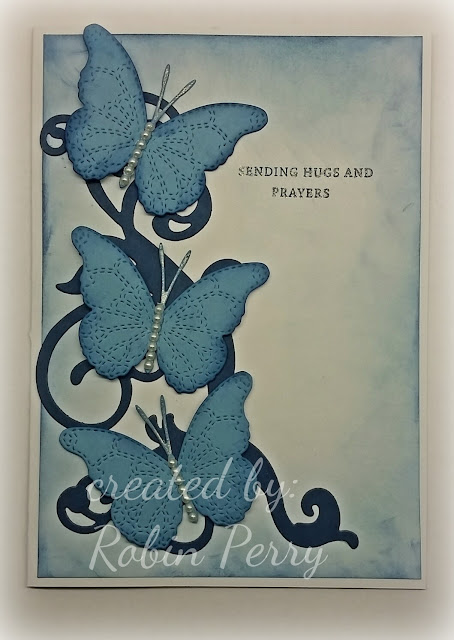
This is my card for today’s  Teapot Tuesday  challenge at Splitcoaststampers.com.  This week, our cards are going out to Carolyn in Douglass, KY.

My card is a very loose CASE of  this card    that I found on Pinterest.  Since my card is very different, it is probably more accurate to say that I was inspired by Hansi's card rather than call mine a CASE (copy and share everything).  Oh well!

I used Papertrey Ink dies to cut the flourishes and Memory Box dies for the butterflies. The sentiment is from  Simon Says Stamps set  #SRHA15.  I used a clear glitter pen over the sentiment and the butterfly antennas.

Wednesday, February 3, 2016

Hand Drawn Poppy

Hand drawn and watercolored poppues

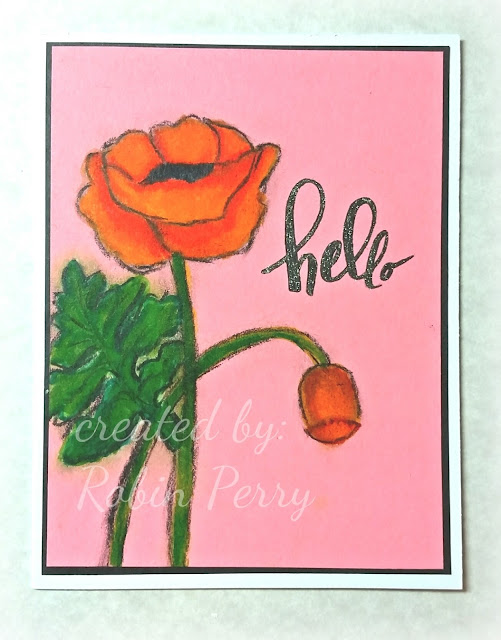
Last night, I doodled this poppy and bud while talking on the phone.  The doodle turned out nice, so I decided to color it with my Zig watercolor markers.  The worst that could happen was that I messed it up so, if nothing else, it would be good practice.  In the end, I was happy with the results! 


After I colored the flower, bud, & stems, I thought it looked a bit bare and needed a leaf.  Well! Instead of looking at some poppy stamps that I have to verify what the leaves actually look like, I decided to cut a stencil using a Heartfelt Creations leaf die.  Rather than of tracing inside the negative space of the stencil, I traced around the actual die cut so the leaf ended up being too fat.  Then, when I colored it with the Zig markers, it got worse!  Oh well, practice makes perfect!   Once the leaf was semi-acceptable, I decided  to stop messing with it! 

I used a black charcoal pencil to draw a line around the image then smeared it a bit with my finger to give the image some depth. After erasing away some of the extra smudges, I sprayed the whole piece lightly with hair spray to set the colors.

After the hair spray was dry, I used my MISTI stamp positioner for the sentiment.  It’s a good thing I did because I had to stamp the sentiment twice to get a good impression.  I then went over it with a clear glitter pen to give it a bit of sparkle.

Tuesday, February 2, 2016

Mixed Media CAS Thinking of You

Today's offering is a mixed media CAS card that was super fun to make!

I stamped the background first, using pink ink, then stamped the tulips onto the background with black ink. No need to maks the images at this point.

I stamped the tulips again on yellow, red, and green cardstocks, did a little shading with coordinating markers, then paper-pieced them onto the background.

After stamping the sentiment, I went over it with a clear glitter pen.  This qualifies this card for this week's CASology challenge to use glitter.